Choose a frame rate for YouTube Shorts, preserve source motion and check export settings. Understand when 30 or 60 fps makes sense. Keep an untouched copy of a representative clip. Apply the effect to a short sample, compare it in motion with the original, and check edges, audio sync and export quality. Record the settings that produced an acceptable result.
Export rule: YouTube recommends uploading at the frame rate of the original recording. Matching the frame rate does not itself convert variable frame rate footage to constant frame rate. If you have sync problems, inspect the source and transcoding settings. YouTube encoding guidance.
Research guide. Vendor information and third-party reports are distinct from our own test results. See how we evaluate tools. We may earn a commission from qualifying purchases through affiliate links. Affiliate disclosure.
TL;DR:
- Shooting at 30 fps is ideal for most Shorts, providing a good balance between motion smoothness and file size for standard content.
- Use 60 fps for fast-moving scenes like sports, dance, or gameplay, especially if planning slow-motion effects, but avoid upscaling to 60 fps if the source was recorded at a lower fps.
- Export at the same frame rate you shot in, as YouTube preserves multiple fps options and converting afterwards offers no quality benefit, only larger file sizes.
- Shooting in variable frame rate may cause sync issues; transcode to constant frame rate before editing and uploading to avoid audio drift.
- Matching the precise technical settings for container, codec, bitrate, and scan type helps maintain quality through YouTube’s re-encoding process.
Table of Contents
- Fps for Shorts: A Quick Checklist Before You Shoot
- What Fps Does YouTube Actually Preserve for Shorts?
- Choosing Between 24, 30, and 60 Fps
- Recording, Transcoding, and Exporting Without Sync Issues
- Getting Smooth Slow Motion and Natural Motion Blur
- How to Verify Your Upload Plays Back Correctly
- Use the directory to compare workflow options, then confirm current features and terms with the provider.
- Try Tested Export Presets
- Where This Guidance Comes From
- Practical Trade-Offs Creators Rarely Talk About
- Sources
- FAQ
Fps for Shorts: A Quick Checklist Before You Shoot
Before you press record, run through this. It takes thirty seconds and saves you a re-shoot.
- Camera setting: Lock your camera app to constant frame rate (CFR), not variable frame rate (VFR).
- Default fps: 30 fps for standard content. Bump to 60 fps for action, sports, or slow-motion capture.
- Cinematic option: 24 fps if you’re going for a film look, but expect some judder on fast pans.
- Export format: MP4 container, H.264 codec, AAC-LC audio at 48 kHz.
- Bitrate target: 8 to 12 Mbps at 1080p, scaling up for 60 fps footage.
- Scan type: Progressive scan, always.
- Upload path: Use the desktop version of YouTube Studio when you can. It handles encoding more cleanly than the mobile app.
- Master files: Keep your original export before any platform compresses it.
Pro Tip: Rename your master file with the fps in the filename (e.g., “recipe_short_30fps_master.mp4”). Six months from now, when you’re pulling clips for a compilation, you won’t have to open every file to check.
What Fps Does YouTube Actually Preserve for Shorts?
YouTube doesn’t force every upload down to one frame rate. The platform commonly preserves 24, 25, 30, 48, 50, and 60 fps, and its own guidance is to export at whatever frame rate you shot rather than converting afterward. That matters more than most creators realize: if your camera captured 30 fps and you render your export at 60, you haven’t gained smoother motion. You’ve just doubled your file size while YouTube’s encoder does extra work for nothing.
For container and codec, the safe combination is MP4 with H.264 video and AAC-LC audio at 48 kHz. That pairing plays cleanly across Android, iOS, and desktop without the codec compatibility issues that show up with less common formats.
Bitrate is where a lot of Shorts lose quality before they even hit the upload button. The general guidance is roughly 8 Mbps for 1080p at 30 fps and closer to 12 Mbps for 1080p at 60 fps, since higher frame rates carry more data per second and need more bits to avoid blocky compression artifacts. If you’d rather set one number and stop thinking about it, a flat 10 Mbps target for 1080×1920 footage is a reasonable middle ground that holds up well after YouTube’s re-encode.
| Setting | Recommended Value |
|---|---|
| Frame rate (standard) | 30 fps |
| Frame rate (fast motion / slow-mo source) | 60 fps |
| Frame rate (cinematic) | 24 fps |
| Container | MP4 |
| Video codec | H.264 |
| Audio codec | AAC-LC, 48 kHz |
| Bitrate (1080p30) | ~8 Mbps |
| Bitrate (1080p60) | ~12 Mbps |
| Scan type | Progressive |
Remember that YouTube re-encodes every upload on its end regardless of how clean your export is. That’s exactly why the master file you export matters: a compressed, low-bitrate source gives the platform’s encoder less information to work with, and every artifact in your original gets amplified, not smoothed out.
Choosing Between 24, 30, and 60 Fps
Frame rate should follow content, not habit. Here’s how the three main options actually play out on a phone screen.
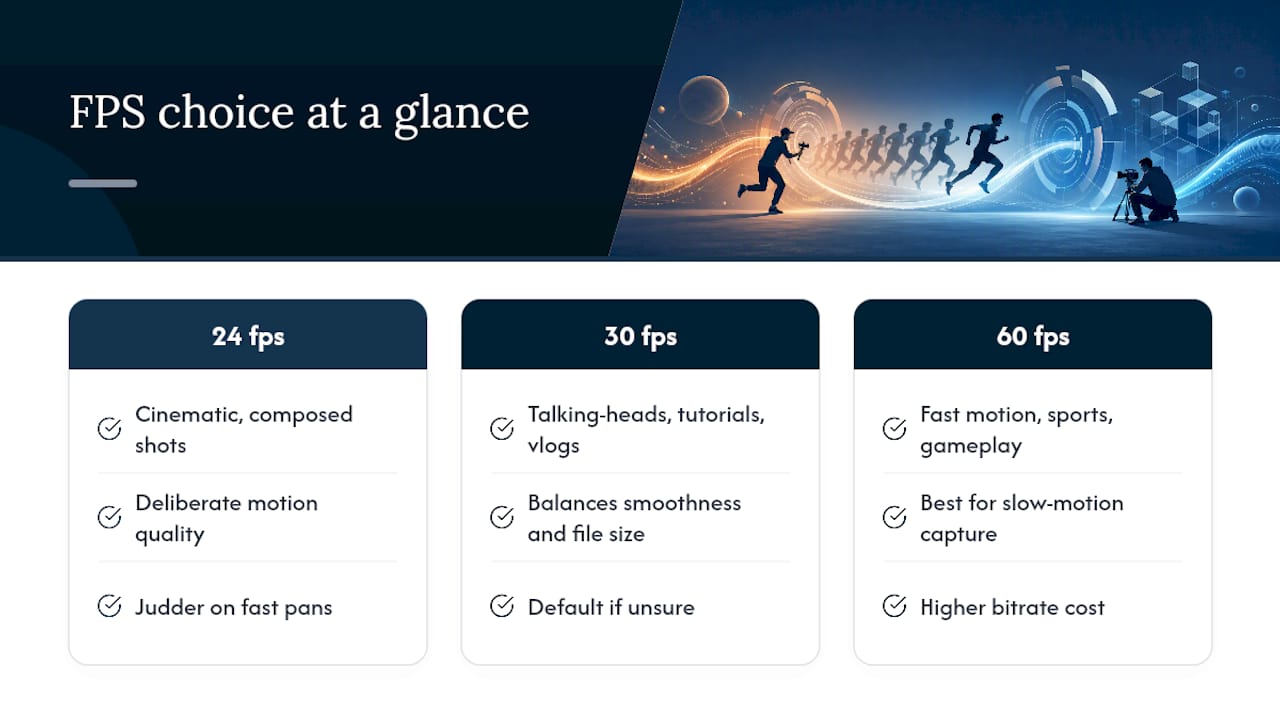
30 fps is the workhorse. It’s the right call for talking-head content, tutorials, cooking demos, and vlogs, because it balances motion smoothness against file size without asking anything extra of your camera or your editing software. If you’re not sure what to shoot, this is the answer.
60 fps earns its higher bitrate cost when there’s real motion to capture. Dance content, sports highlights, gameplay footage, and anything with fast hand or camera movement all look noticeably better at 60 fps, because the extra frames reduce the blur and stutter you’d otherwise get from fast subjects crossing the frame. It’s also the frame rate you want if you plan to slow footage down later. Shooting at 60 and playing it back at 30 gives you a genuine half-speed slow motion effect with real captured frames, not a software guess at what happened between them.
24 fps is the deliberate choice for a cinematic feel. It’s the frame rate most films are shot at, and it carries that same slightly weighted, dramatic motion quality. The tradeoff is judder: fast pans or quick handheld movement can look choppy at 24 fps in a way that 30 fps handles more gracefully. Save it for slower, more composed shots.
Beyond fps, length still shapes performance. Creator survey data shows Shorts under 30 seconds tend to perform best for reach, while Shorts in the 30 to 60 second range tie for subscriber growth. Pairing a snappy under-30-second cut at 30 fps with a longer 60 fps highlight reel of the same footage is a reasonable way to test both goals without shooting twice.
Recording, Transcoding, and Exporting Without Sync Issues
Getting from camera to clean upload takes a few deliberate steps, especially if you’re shooting on a phone.
- Check your camera app’s frame rate setting. Most phones default to variable frame rate (VFR), which adjusts frame timing on the fly to save storage. That’s efficient for casual video, but it’s a problem for editing and upload.
- Transcode VFR footage to CFR before you edit. A tool like HandBrake converts your file to constant frame rate, locking every frame to a fixed interval. Skipping this step is one of the most common reasons audio drifts out of sync partway through a Short after upload.
- Shoot at your delivery resolution and fps from the start. Record at 1080×1920 and whatever fps you’ve chosen for that piece of content, and keep an untouched master file separate from your edited export.
- Export with matching settings. H.264 MP4, High Profile, AAC-LC at 48 kHz, and a bitrate in the 8 to 12 Mbps range depending on your fps.
- Upload from a desktop through YouTube Studio when possible. It tends to produce a cleaner encode than the mobile app, and the same 1080×1920 MP4 preset cross-posts cleanly to TikTok and Instagram Reels if you’re repurposing the same file.
Pro Tip: If you’re pulling clips from a longer video to turn into Shorts, check the source fps first. A long-form interview shot at 24 fps and a Short shot at 30 fps will feel like two different projects if you cut them together without matching frame rates.
Getting Smooth Slow Motion and Natural Motion Blur
True slow motion comes from capturing extra frames, not from stretching a clip in your editor. Shoot at 60 or 120 fps, then conform that footage down to 30 fps in your NLE, and you get real half or quarter speed motion with frames that actually exist. Interpolating a 30 fps clip up to 60 with optical flow or AI tools is a fallback, not a first choice. Watch for ghosting around moving edges and warping on complex textures like hair or foliage. Always preview before publishing.
- Shoot slow motion at a higher native fps, never upconvert after the fact.
- Follow the 180-degree shutter rule: set your shutter speed to roughly double your fps for natural motion blur.
- In low light, you may need to loosen that rule slightly to avoid a dark, noisy image.
- Before exporting, scrub your timeline for dropped frames or stutter, especially at cut points.
How to Verify Your Upload Plays Back Correctly
Don’t assume your Short is fine just because it exported without an error message.
- Inspect your master locally first. Play it at native fps and listen for drift between audio and lip movement.
- Upload as unlisted before you publish. Test playback on an Android phone, an iPhone, and a desktop browser through the actual YouTube app, not just a preview screen.
- Watch for stutter or sync drift. If you spot it, re-transcode your source to CFR, raise your bitrate, or re-export from your editing software rather than re-uploading the same file.
- Run small A/B tests. Post similar content at 30 fps and 60 fps a few weeks apart and compare watch time and retention.
How to Evaluate This Workflow
Keep an untouched copy of a representative clip. Apply the effect to a short sample, compare it in motion with the original, and check edges, audio sync and export quality. Record the settings that produced an acceptable result.
This is a suggested evaluation process, not a report of a completed TechVideoBlog benchmark.
Try Tested Export Presets
You’ve got the settings. The faster path is skipping the trial and error of building them yourself. Export presets are tested through real upload cycles, checking for sync drift, compression artifacts, and bitrate waste before recommendations are made, so creators avoid discovering a VFR problem after their Shorts already have many views and a lip-sync issue.

Where This Guidance Comes From
The export numbers and platform behavior in this guide come from a handful of focused sources rather than general assumption. YouTube’s own upload guidance outlines accepted frame rates and container recommendations, while bitrate targets and codec pairings are detailed in ShortSync’s upload requirements breakdown. The VFR-to-CFR sync issue that trips up so many phone-shot Shorts is documented in a technical discussion on YouTube’s encoding behavior, and Shorts length performance data comes from a creator survey on engagement by duration. For creators tracking how fps and length choices affect actual audience behavior, a guide to engagement analytics offers a useful framework for setting up your own A/B comparisons.
Practical Trade-Offs Creators Rarely Talk About
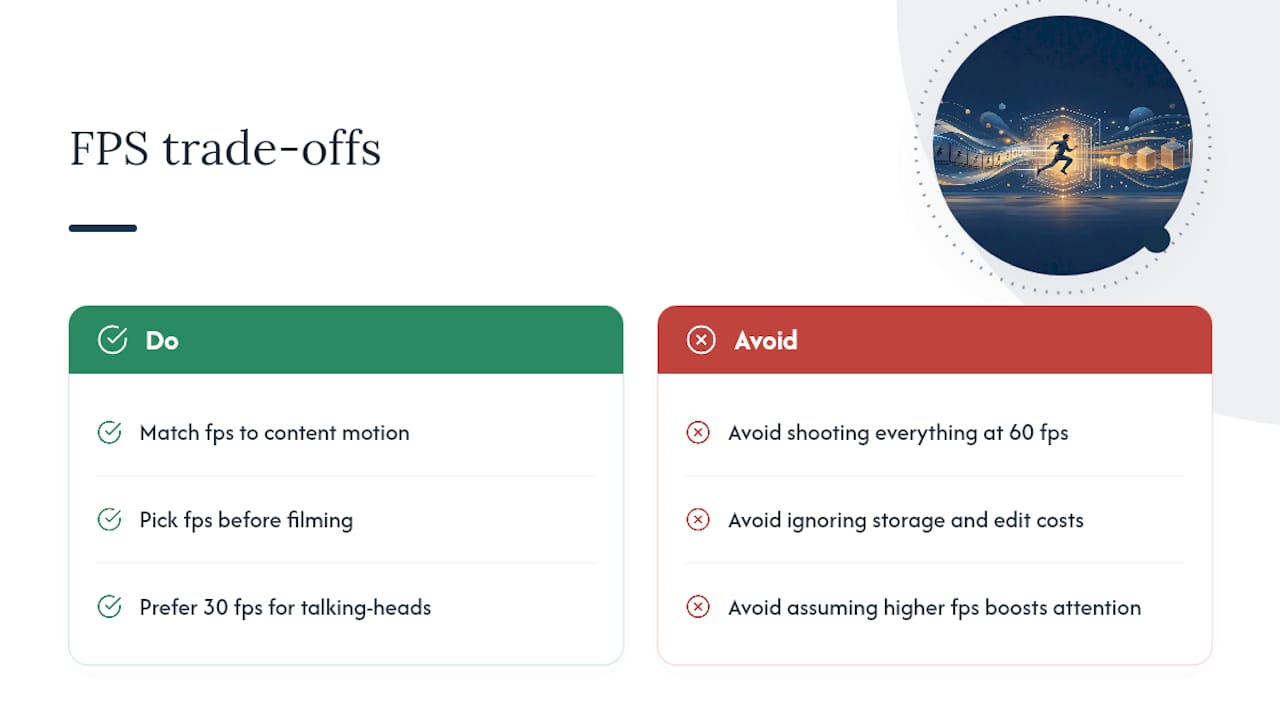
Most fps advice stops at “60 fps looks smoother,” and leaves out what that smoothness actually costs you. It’s not just storage. It’s edit time, since 60 fps timelines render slower and stress older laptops during preview. It’s also attention: viewers rarely consciously notice frame rate, they notice motion that feels off, which means the fps choice only matters when it’s wrong for the content, not as a blanket upgrade.
The bigger mistake I see is creators shooting everything at 60 fps “to be safe,” then wondering why their file sizes and editing times balloon for content that never needed the extra data in the first place. A talking-head Short at 60 fps isn’t a mistake, but it’s rarely better than the same clip at 30. The frames that matter are the ones capturing motion your viewer would otherwise miss, not motion that’s already sitting still in front of a webcam. Match the tool to the job, and the fps decision stops being a guessing game and starts being a two-second choice you make before you even pick up the camera.
Sources
- YouTube Shorts Length, Size & Requirements 2026 | Vidpal | Vidpal
- YouTube Shorts Upload Requirements 2026 (Length, Format, Size, Aspect Ratio) | ShortSync
- Video quality degrades when uploading to YouTube with variable frame rate – Superuser
- YouTube Shorts length study (creator survey) | ContentGrip
FAQ
What is the best fps for Shorts?
30 fps is the best default for most Shorts, since it balances smooth motion with reasonable file size for talking heads, tutorials, and vlogs. Use 60 fps for fast motion or slow-motion capture, and 24 fps for a deliberate cinematic look.
Is 24 or 30 fps better for YouTube?
Neither is universally better. 24 fps gives a cinematic, film-like feel but can judder on fast pans, while 30 fps handles standard content and quick camera movement more smoothly.
What fps do YouTube Shorts use?
YouTube commonly preserves 24, 25, 30, 48, 50, and 60 fps uploads and recommends exporting at the same frame rate you shot rather than converting afterward.
Should I use 29.97 or 30 fps?
Either works for Shorts, since YouTube handles both without issue, but 30 fps is simpler to work with in most phone camera apps and editing software and avoids rounding confusion during transcoding.
Does converting 30 fps footage to 60 fps improve quality?
No. Converting without capturing real additional frames increases file size but doesn’t add genuine motion detail, and matching your original source fps in your export almost always looks better than an artificial upconversion.