The fastest reliable path to good auto subtitles for shorts is auto-transcribe, then a 30 to 90 second edit pass, then a burned-in export sized for vertical video. Machine transcription gets the majority of the way there depending on audio clarity; the edit pass fixes the rest. Skip the edit and you’re publishing someone else’s typos.
TL;DR:
- Auto-transcription effectively captures clear audio but often requires manual editing for accuracy, especially with background noise or accents.
- For cross-platform Shorts, burned-in captions are essential, as they remain visible across TikTok, Instagram, and YouTube, unlike text-track captions that vanish outside their platform.
- Testing caption tools on challenging audio clips helps determine their true accuracy and safe-zone placement before committing to a workflow.
- Use bold, large sans-serif fonts with a background box, and keep captions clear of UI overlays, to maximize legibility on phone screens.
- A streamlined workflow involves cleaning audio first, auto-transcribing, editing for punctuation and timing, then previewing on a phone before publishing.
Table of Contents
- What Are Auto Subtitles for Shorts, Exactly?
- Shortlist: Tools That Auto-Generate Subtitles for Shorts
- How Do You Choose the Right Subtitle Tool for Your Shorts?
- Step-by-Step: From Raw Clip to Publish-Ready Captions
- What Caption Style Actually Stays Legible on a Phone Screen?
- What We Found Testing Shorts Caption Workflows
- When I Burn Captions In, and When I Don’t
- Find Your Shorts Caption Workflow Faster
- Sources
- FAQ
What Are Auto Subtitles for Shorts, Exactly?
“Auto subtitles” is the everyday term. The industry calls it automatic speech recognition (ASR) captioning, and the distinction matters because it explains why every tool below still needs a human check.
ASR models transcribe audio into text using pattern recognition trained on speech data, not human listening. That works well for clean studio audio and stumbles on accents, overlapping voices, music beds, and mumbled asides. YouTube itself flags this: its automatic captioning supports a wide range of languages and includes “expressive captions” for English, but Google recommends creators supply professional captions first because machine-generated accuracy varies with audio conditions.
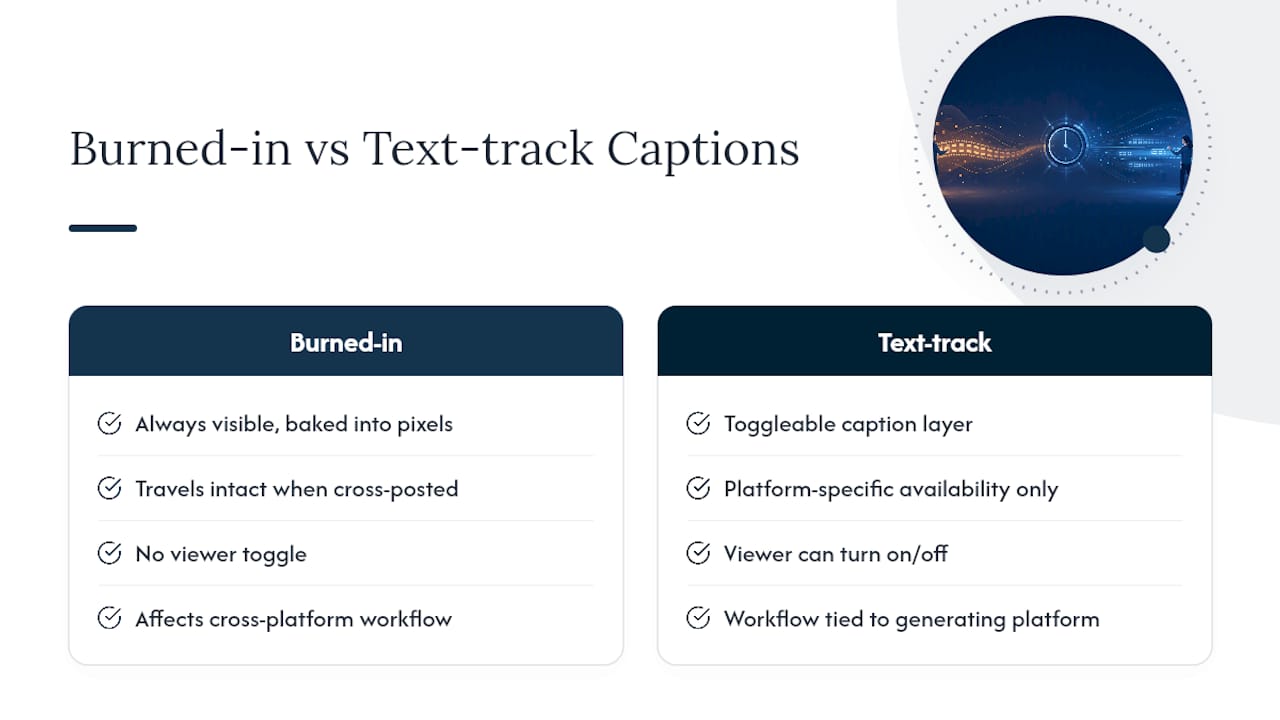
Two output formats matter for Shorts specifically. Burned-in captions are baked into the video pixels, always visible, and travel intact when you cross-post to TikTok or Instagram. Text-track captions live as a separate toggleable layer, viewer-controlled, and only work inside the platform that generated them. Your choice between the two decides half of your workflow.
Shortlist: Tools That Auto-Generate Subtitles for Shorts
Four categories cover almost every creator’s need here, and each does one job better than the others.
YouTube’s native automatic captions are the zero-effort option if you’re publishing straight to YouTube Shorts. They’re free, built into the upload flow, and support broad language coverage plus expressive captions for English. The catch: they’re a text track, so they vanish the moment that same clip lands on TikTok, and YouTube’s own guidance admits accuracy drops with background noise or heavy accents.
Canva’s subtitle feature auto-generates captions inside its editor, then lets you style and export them burned-in. Canva’s subtitle tool is genuinely fast if you’re already editing in Canva for thumbnails or graphics, and its preset styles cover most basic legibility needs without a design background.
AutoCaption is built specifically for the stylized, animated caption look that dominates TikTok and Reels right now. AutoCaption’s platform ships templates aimed at social formats and a timeline editor for nudging word timing, which matters more than it sounds once you’ve tried to sync a punchline to a jump cut.
Generic auto-subtitle generator platforms are a broader category of dedicated captioning tools that prioritize batch speed and consistent presets across a run of clips. They vary by vendor in language support and polish, but they’re worth knowing about if you’re producing volume and need the same look on every export without rebuilding settings each time.
If speed alone decides it, YouTube’s native option wins because there’s no export step at all. If you want stylized animated text, AutoCaption’s presets do the heavier lifting. Canva is the best free-tier all-rounder if you’re already inside that ecosystem. For running the same look across a batch of clips, the generic generator category is where you’ll land.
How Do You Choose the Right Subtitle Tool for Your Shorts?
Run every candidate through the same checklist before committing to one for your workflow.
- Does it export burned-in, or only a toggleable text track? Cross-posting requires burned-in.
- Can you edit at the word level, or only re-type whole lines? Word-level editing saves real time on timing fixes.
- Does it offer a direct 9:16 export preset, or do you need to crop and resize manually afterward?
- What languages does it support, and does it auto-translate if your audience is multilingual?
- Does the free tier watermark your export, and what does the paid tier actually unlock?
During a trial, export one real clip and check three things: does the burned-in text survive the export, does the caption line sit inside the safe zone once you view it on a phone, and how long did the edit pass actually take you. If a “free” tool watermarks every export or the timeline editor lags on a 20-second clip, that’s a red flag worth walking away from before you build a habit around it.
Pro Tip: Test your shortlisted tool on your worst-audio clip, not your best one. A tool’s real accuracy shows up on the clip with background music or a rushed voiceover, not the one recorded in a quiet room.
Step-by-Step: From Raw Clip to Publish-Ready Captions
Here’s the workflow that gets a Short from raw footage to a captioned, exportable file efficiently.
- Clean the audio first. Trim dead air, boost your voice track if it’s buried under music, and make sure your hook line in the first one to three seconds is clearly audible. ASR fails hardest on the loudest, most important line if it’s mixed too quietly.
- Run auto-transcription. Pick a burned-in Shorts preset if you plan to post the same file to TikTok or Reels; pick native captions only if this clip lives exclusively on one platform.
- Edit the transcript. Fix punctuation, catch any flagged profanity, split lines that run too long for one screen, and confirm timing stays synced to the audio.
- Check safe-zone placement. Preview the caption position against the platform’s UI overlays before exporting, since burned-in text placed too low or too far right can be lost.
- Export and test on your phone. Render as a 9:16 MP4, then actually open it on a phone screen, with the app’s UI visible, before you hit publish.
| Step | What to check | Why it matters |
|---|---|---|
| Audio prep | Hook line audible in first 1-3 sec | ASR mishears quiet or buried audio |
| Transcription | Right preset for burned-in vs native | Determines cross-platform survival |
| Edit pass | Punctuation, line length, sync | Fixes the 5-20% ASR typically misses |
| Export | 9:16 MP4, safe zone clear | Prevents UI overlays from hiding text |
What Caption Style Actually Stays Legible on a Phone Screen?
Most legibility failures aren’t an ASR problem. They’re a design problem that shows up only once you view the export on an actual device.
Use a bold sans-serif font, sized large enough to read at arm’s length on a phone, and add either a stroke or a semi-opaque background box behind the text. Without one of those two, captions wash out against busy backgrounds the moment the shot changes. Style guidance from CapsAI recommends exactly this combination for Shorts specifically, because vertical video backgrounds shift constantly compared to horizontal formats.

Safe zones matter just as much as font choice. Shorts, Reels, and TikTok all stack UI elements (like buttons, usernames, and captions) along the bottom third and right edge of the screen. Captions placed low or right-aligned routinely get covered by that UI, which is exactly the kind of failure a University of Colorado accessibility guide warns against when it recommends testing captions across full scenes, not just one attractive frame.
Word-by-word “karaoke” style captions tend to work best for punchy, high-energy hooks where each word lands on a beat. Block captions, showing a full line at once, suit narration-heavy or explainer content where the reader needs the whole sentence at a glance. Either style should still include basic punctuation and speaker labels when more than one person talks, since that’s what keeps expressive-caption accessibility intact rather than reducing captions to a wall of unpunctuated text.
- Bold sans-serif, sized for arm’s-length phone viewing
- Stroke or background box behind every line
- Keep text out of the bottom third and right-edge UI zones
- Karaoke style for hooks, block style for narration
- Punctuation and speaker labels preserved, not stripped
What We Found Testing Shorts Caption Workflows
Techvideoblog ran a series of workflow tests across short clips, transcribing the same footage through multiple tools and checking legibility directly on a phone screen rather than trusting the desktop preview.
The consistent pattern: clean, single-speaker audio needed almost no manual correction, while clips with music beds or two overlapping voices needed a real edit pass every time, regardless of which tool generated the first draft. Presets built specifically for social formats required the least repositioning to clear the safe zone; generic default styles needed manual adjustment more often.
- Always export and view on an actual phone before publishing, not just the editor preview.
- Timing drift on fast cuts caused more legibility complaints than wrong words.
- Presets built for TikTok/Reels/Shorts cleared safe zones more consistently than default styles.
Full test breakdowns and preset comparisons live in Techvideoblog’s AI captions category for anyone who wants the tool-by-tool notes.
When I Burn Captions In, and When I Don’t
I burn captions in whenever a clip is going anywhere besides its original platform, or when the hook depends on the first three seconds being readable with sound off. Native captions are fine for a one-off, platform-only post where saving ten minutes matters more than branding consistency. My publish checklist before any Short goes live: transcript edited, safe zone clear, tested on a phone screen.
— H
Find Your Shorts Caption Workflow Faster
Testing five caption tools yourself costs you an afternoon you don’t have between shoots. Techvideoblog runs those workflow tests for you, on real Shorts-length clips, checking accuracy, export presets, and safe-zone placement so you’re not the one discovering a watermark on export day.
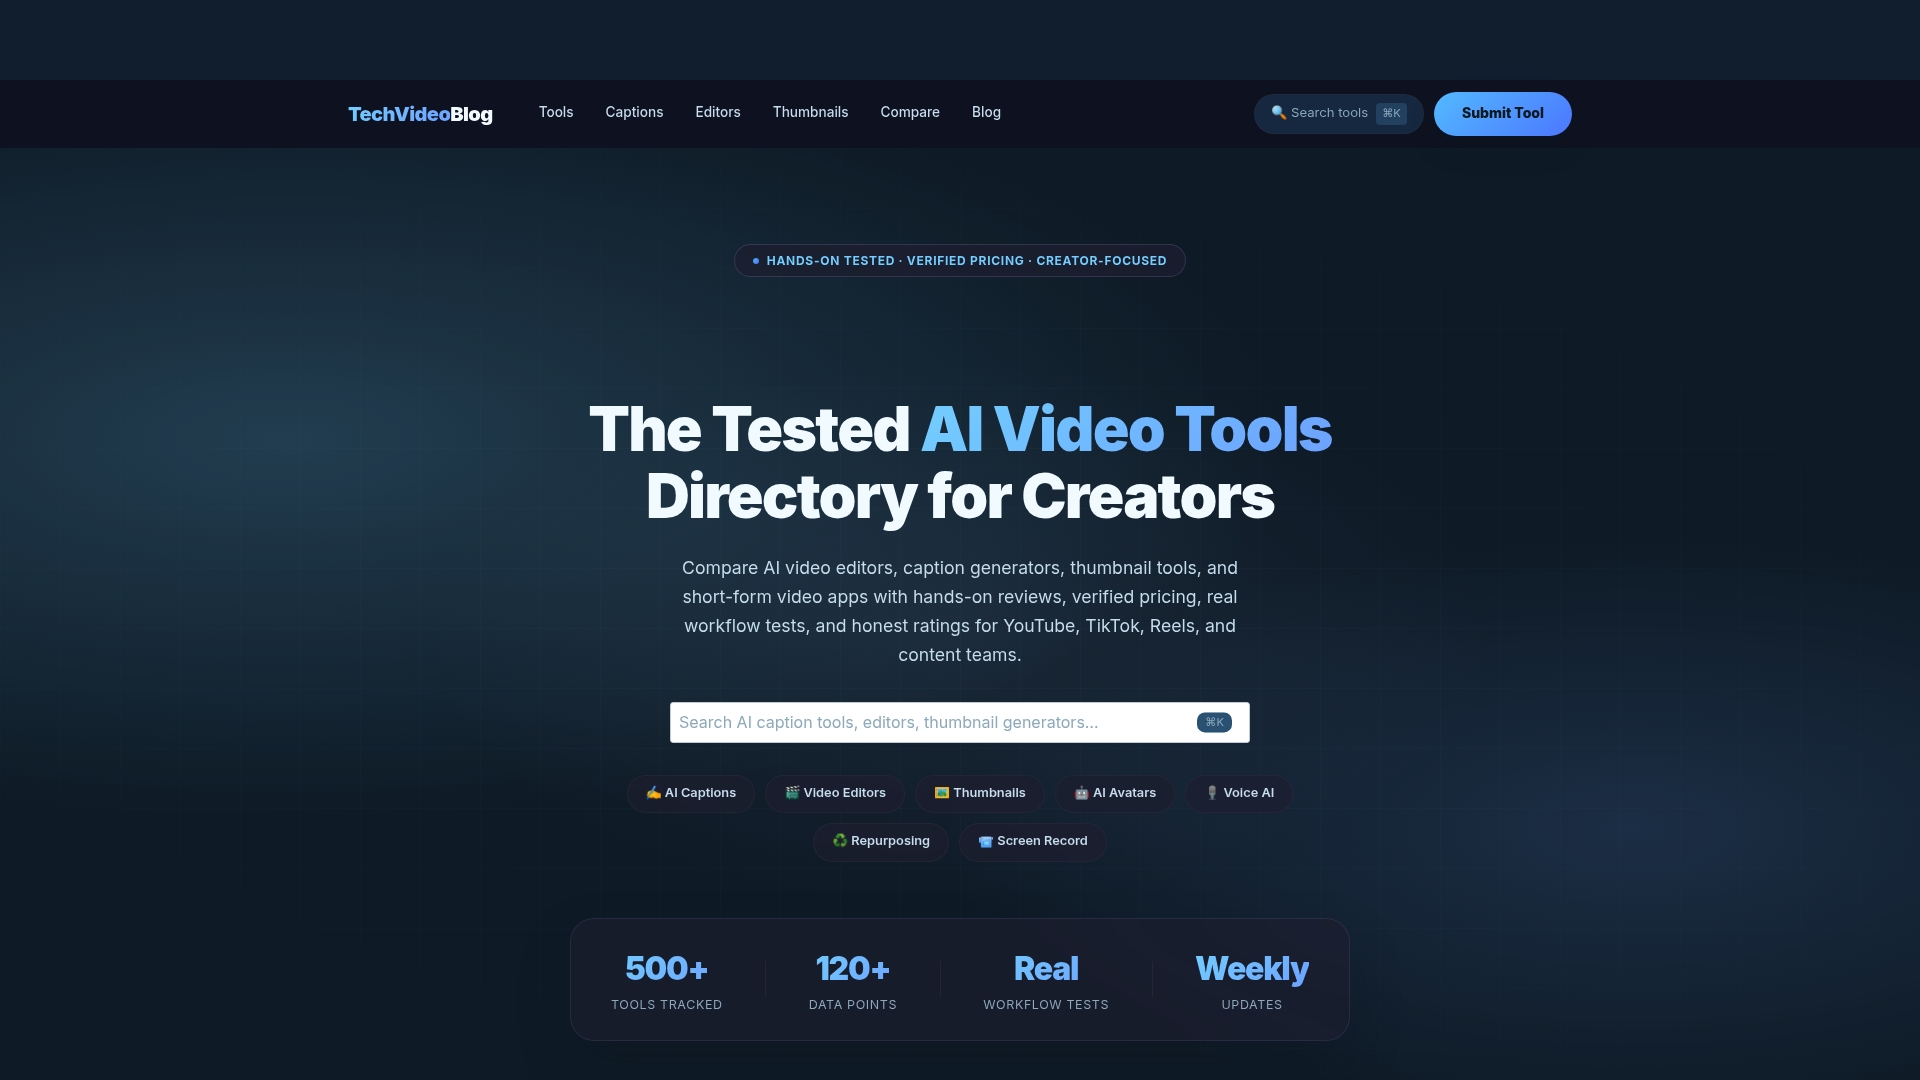
The directory breaks down tested AI subtitle generators by pricing clarity, editing granularity, and platform presets, alongside a broader Shorts tool roundup for creators building a full vertical-video pipeline. If you’re also refining export settings for other vertical formats, Kudoflix’s guidance on short-vertical exports is a useful companion read. Visit Techvideoblog to compare full test reports before you commit to a monthly plan.
Sources
- YouTube Help – Use automatic captioning
- Captioning quality — University of Colorado digital accessibility
- AutoCaption — Add Captions to Your Videos in Seconds
- Canva — Add subtitles to video online for free
- YouTube Shorts caption styles – CapsAI
FAQ
Is there a way to auto-generate subtitles for a video?
Yes. Platforms like YouTube auto-generate a text-track caption on upload, while editors like Canva and dedicated tools like AutoCaption generate burned-in captions you can style and export directly.
How can I create captions for Shorts specifically?
Auto-transcribe your clip in a tool with a Shorts or 9:16 preset, run a quick edit pass for accuracy and line breaks, then export burned-in if you plan to cross-post to TikTok or Reels.
How do I automatically generate subtitles for a video?
Upload your clip to an ASR-powered tool such as YouTube’s native captioning, Canva, or AutoCaption, let it transcribe the audio, then review the draft before publishing since accuracy varies with audio clarity.
How do I turn on auto captions on YouTube?
In YouTube Studio, open your video’s subtitle settings and select the auto-generated language track; YouTube’s help documentation walks through enabling and editing that track.
Do burned-in captions work better than native captions for Shorts?
Burned-in captions stay visible no matter which app the clip lands in, which makes them the safer choice for anything you’re cross-posting; native captions are fine for platform-exclusive uploads where speed matters more.