
Cloud-based caption generators that burn subtitles directly into your video are the fastest route to a share-ready Reel. They combine automatic speech-to-text, an editable transcript, and a one-click export, so you skip the frame-by-frame subtitle work that used to eat up an editing session.
For most creators chasing auto captions for reels, the shortlist comes down to five names: Kapwing for an all-in-one editor with social presets, Canva if you already live in its design tools, VEED for clean styling controls, vSubtitle for fast SRT/VTT exports with multi-language claims, and CapsAI for animated word-by-word captions. Recapo.ai rounds it out for creators who repost the same clip across Reels, TikTok, and Shorts and need consistent burned-in text.
If speed is your only concern, grab whichever tool has the shortest queue when you upload. If brand polish matters more, prioritize styling controls over raw transcription speed.
Key Takeaways
The fastest path to publishable Reels captions is an AI tool that generates an editable transcript and exports a burned-in MP4 with a safe-area check before you upload.
| Point | Details |
|---|---|
| Pick by workflow, not hype | Choose Kapwing or VEED for editing plus captions in one app, CapsAI for animation, vSubtitle for fast SRT/VTT exports. |
| Always edit the transcript | Background music, accents, and jargon still trip up AI transcription; a quick manual pass catches most errors. |
| Burn in for Reels | Instagram doesn’t reliably render separate caption files, so burned-in MP4 exports are the safer default. |
| Check the safe-area preview | Captions placed too low get covered by Instagram’s UI; verify placement before you export. |
| Free tiers work for light posting | Most tools cap exports or minutes, so daily posters should test the free tier’s real limits before upgrading. |
| Compare tools before you commit | Techvideoblog’s tested comparisons show real export quality across tools like Kapwing, VEED, and CapsAI. |
Table of Contents
- What Are the Best Tools for Auto Captions for Reels?
- How Do You Choose the Right Auto-Caption Tool?
- How Do You Add Auto Captions to a Reel Step by Step?
- Which File Formats and Platforms Do These Tools Support?
- What Do Captions Actually Do for Reels Performance?
- What Does Auto Caption Software Cost?
- How Many Languages Do These Caption Tools Support?
- When Should You Skip Native Captions for a Third-Party Tool?
- Where Can You Test These Tools Side by Side?
- Sources
- FAQ
What Are the Best Tools for Auto Captions for Reels?
None of these six tools wins on every dimension, and that’s the point. Kapwing, Canva, and VEED show up repeatedly across Instagram Reels caption searches because they solve slightly different problems, while vSubtitle, CapsAI, and Recapo.ai target the Reels workflow more directly.
Kapwing works as a full editor first and a caption tool second. If you’re already trimming clips, adding b-roll, and cutting to length, its integrated subtitle generator and social export presets save you from bouncing between apps. The trade-off is that its free tier caps exports, so heavy posters will hit a paywall fast.

Canva makes sense if your Reels lean heavily on branded templates and text overlays you’ve already built in Canva for other assets. Its one-click caption generation sits inside a familiar visual editor, but the styling options for animated captions are thinner than what a dedicated caption tool offers.
VEED’s Auto Subtitle button lives right in the subtitles menu, and it gives you enough style presets to match a brand look without a steep learning curve. It’s a solid middle ground: not as animation-heavy as CapsAI, not as design-locked as Canva.
vSubtitle leans into the Reels-specific use case, advertising accuracy up to 99% on certain content types and offering both SRT/VTT and burned-in exports. Treat that accuracy figure as a vendor claim rather than an independent benchmark. It usually holds up on clean studio audio and drops on noisy clips, the same pattern every speech-to-text tool shows.
CapsAI and Recapo.ai serve narrower jobs well. CapsAI’s word-by-word animation and multi-language support fit creators chasing the bouncing-caption look that dominates trend audio right now. Recapo.ai’s safe-area preview and platform-ready MP4 downloads matter most if you’re pushing the same clip to Reels, TikTok, and YouTube Shorts without re-editing three times.
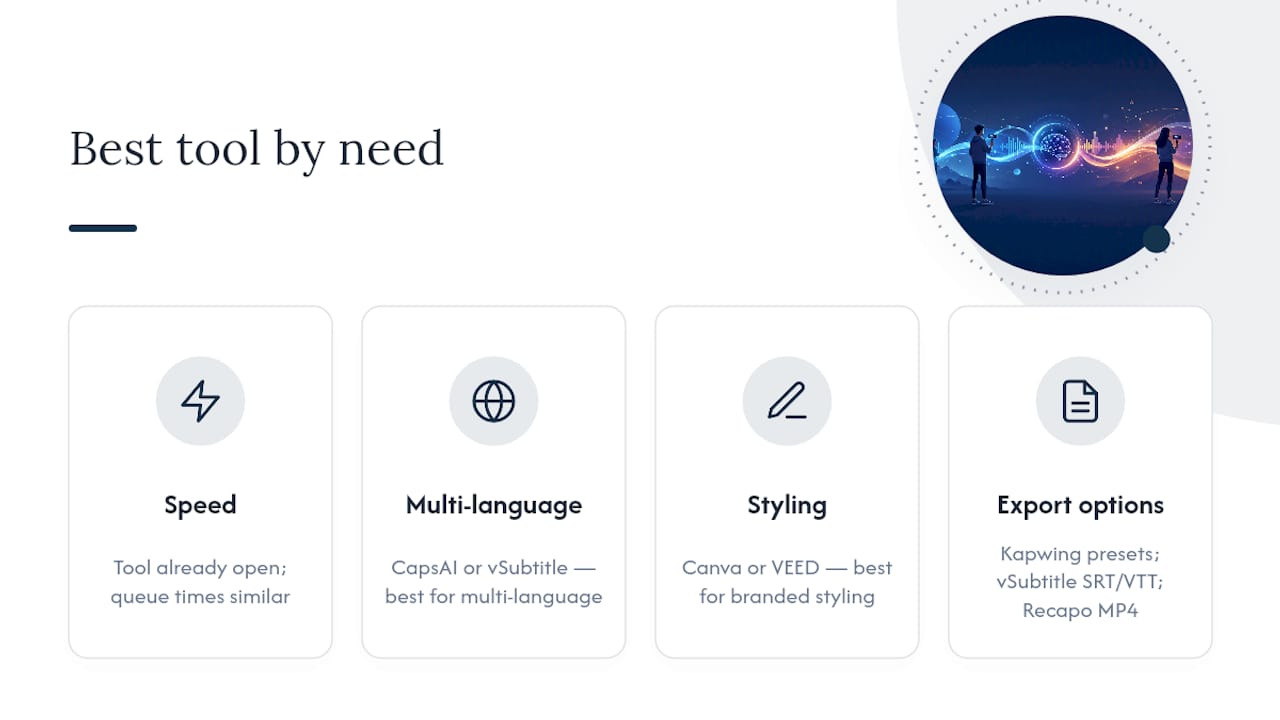
Quick picks: fastest overall workflow goes to whichever tool you already have open, since queue times are comparable across all six. Best for multi-language work is CapsAI or vSubtitle. Best for branded styling is Canva or VEED.
How Do You Choose the Right Auto-Caption Tool?
Run every tool through the same checklist before you commit to one for your regular workflow.
- Accuracy on noisy audio. Test with a clip that has background music or a non-neutral accent, not your cleanest sample.
- Editor quality. Confirm you can click into the transcript and fix a word without retyping the whole line.
- Export flexibility. Check whether you get both a burned-in MP4 and an SRT/VTT file, not just one.
- Caption styling. Look for font, color, and position controls, plus animation if you want word-by-word emphasis.
- Safe-area preview. Confirm the tool shows you where Instagram’s UI elements sit before you export.
- Language support. If you post in more than one language, check the actual supported list, not just a headline number.
- Platform presets. See if the tool exports at Reels’ 9:16 ratio automatically or forces you to crop manually.
Watch for these red flags: no editable transcript (you’re stuck with whatever the AI heard), no burned-in export option, a safe-area preview that’s buried three menus deep, and free tiers that block export entirely rather than just limiting minutes.
Here’s a five-minute test you can run on any trial account: upload a 15 to 30 second clip, time how long transcription takes, check the safe-area preview against Instagram’s actual caption bar position, then export and confirm the file plays correctly. If a tool fails any one of those in under five minutes, move on.
On cost versus speed: a slightly lower accuracy tool that generates captions in 20 seconds and lets you fix three words is a better deal than a “more accurate” tool that takes two minutes and locks basic exports behind a paywall. Editable transcripts fix accuracy gaps faster than a marginally better algorithm does.
How Do You Add Auto Captions to a Reel Step by Step?
The fastest reliable path is upload, auto-transcribe, edit the transcript, check styling and safe-area placement, export a burned MP4, then upload to Reels.
- Upload your clip. Most tools accept MP4 and MOV directly, and several also accept a YouTube link if your Reel is a repurposed cut from a longer video.
- Let the AI generate the transcript. This typically takes under a minute for a 30 to 60 second Reel, faster than manual subtitling by a wide margin.
- Edit the transcript for errors. Focus on named entities, brand terms, and any line covering your hook, since a wrong word in the first three seconds costs more attention than one buried mid-clip.
- Set styling for phone readability. Use a bold sans-serif font, high-contrast color, and position captions in the middle third of the frame, away from Instagram’s username and caption bar.
- Run the safe-area check. Confirm no caption line sits where the UI’s like, comment, or share buttons will cover it.
- Export as a burned-in MP4. This locks the caption style regardless of how the viewer’s device renders text.
- Upload to Instagram and add your written caption. The first 125 characters of that caption function like a headline, and hook-driven captions see roughly 30 to 40% more saves than flat, descriptive ones.
Common failure modes worth checking before you trust a transcript: background music blending with speech, regional accents the model wasn’t trained heavily on, and niche jargon or brand names it has never seen. A quick two-pass workflow works well here: let the AI generate a first pass, then do a manual second pass focused only on names, numbers, and your opening line.
Pro Tip: Use search-and-replace inside the transcript editor to fix a recurring misheard word across the whole clip in one pass, instead of correcting it line by line. If you’re batch-processing several Reels, export SRT files for all of them first, then do your styling pass in one sitting rather than switching contexts per clip.
Which File Formats and Platforms Do These Tools Support?
Every major auto-caption tool for Reels accepts MP4 and MOV uploads directly, since those are the two formats phones and most editing apps export natively. Several also accept a YouTube link as input, which matters if your Reel started life as a clip from a longer video you already published elsewhere.
On the output side, expect two standard choices: a burned-in MP4 with captions permanently rendered into the video, or a separate SRT/VTT file you can layer onto the footage yourself in another editor. The burned-in option is what most Reels creators use, since Instagram doesn’t reliably render uploaded caption files the way YouTube does. SRT/VTT still matters for creators repurposing the same footage to a platform that does support separate caption tracks, or for accessibility archiving.
Integration depth varies more than most creators expect. Kapwing and VEED build captioning into a broader editing timeline, so you’re not exporting from one app and importing to another. Canva ties captioning to its design canvas, useful if your Reels already use Canva-built graphics. vSubtitle and Recapo.ai stay narrower and faster, built specifically around the upload-caption-export loop rather than full video editing.
If you’re pulling clips from a longer podcast or interview, a dedicated transcription pipeline like YumiLM’s YouTube transcription tool can generate a working transcript before you ever touch a caption editor, which speeds up the whole chain when you’re cutting several Reels from one source video.
What Do Captions Actually Do for Reels Performance?
Captions solve three separate problems at once, and creators who only think about accessibility are leaving engagement on the table.
The accessibility case is the most obvious: viewers watching on mute, in a language they’re still learning, or with hearing loss simply can’t access audio-only content. That’s a real chunk of your potential audience closed off without text.
The engagement case is less obvious but arguably bigger. A huge share of Reels get watched with sound off, especially in public settings or during passive scrolling. No captions means that entire viewing context drops your video immediately, no matter how good the audio content is.
Watch time follows from both. A viewer who can follow along without sound is more likely to finish the clip, and completion rate feeds directly into how often Instagram’s algorithm surfaces your Reel to new viewers. Captions with a strong opening line do double duty here, since Vervox’s guidance notes that DM shares carry considerably more algorithmic weight than likes, and a viewer is far more likely to forward a clip they could actually read and understand in the first two seconds.
What Does Auto Caption Software Cost?
Every major tool in this comparison offers a free tier, but the limits differ enough to change which one fits your posting frequency.
Kapwing, Canva, and VEED typically cap free usage by export count, video length, or watermarking, pushing frequent posters toward a paid plan once they’re publishing several Reels a week. vSubtitle and CapsAI generally limit free transcription minutes rather than export count, which matters if you’re captioning several short clips versus one longer video. Recapo.ai follows a similar minutes-based limit, structured around its safe-area preview and burned-in MP4 workflow.
For a creator posting a Reel or two a week, most free tiers hold up fine. Daily posters or agencies managing multiple accounts will hit the ceiling within the first month and need to weigh a paid tier against a tool with less restrictive lifetime limits. Before paying for anything, run the five-minute trial test from the “how to choose” section above on the free tier first. If it stumbles on accuracy or blocks the export you actually need, no price point fixes that.
Free tiers also make useful test beds for comparing accuracy across tools on your specific audio profile, whether that’s a heavy accent, background music, or niche vocabulary, before committing budget to any single one.
How Many Languages Do These Caption Tools Support?
Language support ranges from adequate to genuinely useful, depending on how far outside English your audience lives.
CapsAI stands out here, advertising support for mixed-language content like Hinglish, where a speaker blends two languages mid-sentence. That’s a real gap in most speech-to-text models, which tend to assume one language per clip and struggle the moment a speaker code-switches. vSubtitle also advertises broad language coverage alongside its accuracy claims, though as with any vendor figure, test it against your own audio before trusting it fully.
Kapwing, Canva, and VEED all support multiple languages for transcription, but translation features (converting the transcript into a different language rather than just transcribing what was spoken) vary in depth and are usually a paid-tier feature. If your audience spans language groups, generating the transcript first and then running a translation pass, either inside the tool or through a separate service, is more reliable than expecting one auto-generated pass to nail both transcription and translation accuracy simultaneously.
Recapo.ai doesn’t emphasize language breadth in its positioning, leaning instead on its cross-platform export consistency. If multi-language support is your top priority, weight your shortlist toward CapsAI or vSubtitle and treat the rest as secondary options for that specific need.
When Should You Skip Native Captions for a Third-Party Tool?
Native Instagram auto-captions handle quick, unbranded content fine. If you’re posting off-the-cuff UGC with no consistent visual identity, the built-in captioning does the job without adding a step.
The moment branding matters, native captions fall short. They don’t offer custom fonts, brand colors, or word-by-word animation, and if you’re posting daily under a recognizable channel look, that inconsistency shows. The same applies the second you repurpose a clip to TikTok or YouTube Shorts, since native captions don’t travel with the file.
A failure mode worth flagging: captions placed in Instagram’s default position frequently sit right where the UI’s caption bar and action buttons live, covering half the text on mobile. The fix is a safe-area preview before export, then a burned-in pass so the placement holds regardless of the viewer’s device.
Where Can You Test These Tools Side by Side?
Reading a comparison table only gets you halfway. The real test is running the same 15 second clip through two or three tools and comparing the transcript, the export quality, and how the caption sits against Instagram’s UI on an actual phone screen.
Techvideoblog built its directory around exactly that gap: hands-on tests instead of marketing copy, with verified pricing and real export comparisons instead of guesswork. Rather than trusting a vendor’s accuracy claim at face value, you can check how Kapwing, VEED, CapsAI, and the rest actually performed on real workflow tests, side by side, before you commit a subscription to any of them. The caption generator directory breaks down pricing tiers and export limits tool by tool, and the free AI caption tools roundup is worth checking first if you’re trying to avoid a paid plan entirely. Start at the Techvideoblog directory to pull up the current test results and pick your first tool to trial today.
Sources
- Instagram Reel Caption Generator | AI Caption Generator
- Instagram Reels Caption Generator Free – AI Captions | CapsAI
- Recapo
- Instagram Caption Generator — Free Reel Hooks from Video | HypeNest
FAQ
How do I get auto captions on my Reel?
Upload your clip to a caption tool like Kapwing, VEED, or vSubtitle, let it auto-transcribe the audio, edit any errors in the transcript, then export a burned-in MP4 before uploading to Instagram.
Does Instagram have automatic captions built in for Reels?
Yes, Instagram offers native auto-captions inside its own Reels editor, but they lack custom fonts, brand colors, and animation controls that third-party tools like CapsAI or VEED provide.
How do I turn on Instagram’s automatic caption feature?
Open the Reels camera or editor, tap the sticker icon, and select the “Captions” sticker; Instagram will auto-generate captions from the clip’s audio track.
How do I add captions to a Reel I’ve already recorded?
Import the finished clip into an auto-caption tool, generate and edit the transcript, then export either a burned-in MP4 for direct upload or an SRT file if you’re posting to a platform that supports separate caption tracks.
Which tools give the most accurate auto captions for Reels?
Accuracy varies by audio quality more than by tool, but vSubtitle advertises up to 99% on clean audio and CapsAI claims similarly high figures; treat both as vendor claims and verify with your own test clip before relying on either.