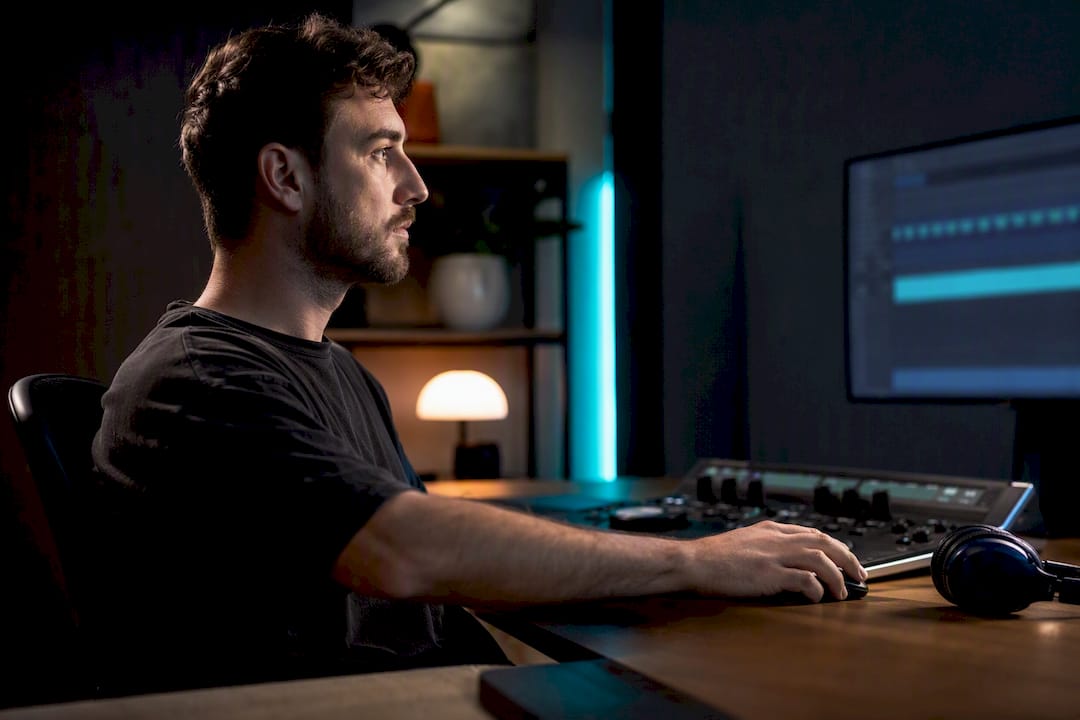
The workflow that scales is simple: capture with markers or Clips, let automation surface candidate moments, run a strict 10-minute human review, then export and schedule. Twitch’s native Highlighter handles the capture side, AI clippers handle volume, and the review pass is what keeps your channel’s voice intact. Everything below breaks that sequence into steps you can run after tonight’s stream.
TL;DR:
- Most creators should batch their highlights weekly to maintain a consistent feed rather than posting immediately after each stream.
- Auto Clips and AI clipping tools can generate candidates within 2 to 15 minutes, but human review remains essential to ensure quality and brand safety.
- When using AI tools, compare their top clips against manual edits first to confirm they capture key moments effectively before automating fully.
- Storage limits require regular deletion of low-performing highlights and downloading valuable clips before reaching the 100-hour cap.
- Automation is a curation aid, and a final human review is necessary once clip volume exceeds a few per week or for content needing precise timing.
Table of Contents
- Building A Twitch Highlights Workflow You Can Repeat Weekly
- How Do Twitch’s Native Highlighter And Clips Actually Work?
- What Do AI Clipping Tools Actually Automate?
- Step-By-Step: From Pre-Stream Setup To Scheduled Export
- What Storage And Copyright Limits Should You Plan Around?
- Choosing Between Twitch-Only, A Mixed Pipeline, Or A Dedicated AI Tool
- When Automation Should Give Way To A Real Editor
- Where To Find Tested Tools Before You Commit
- Sources
- FAQ
Building A Twitch Highlights Workflow You Can Repeat Weekly
You do not need a five-step checklist to start clipping. You need five steps you will actually repeat every single stream, because a workflow that only works on your best day is not a workflow.
- Turn on VOD storage and enable Clips in your creator dashboard so raw footage and shareable segments both exist after you go offline.
- Add stream markers live, either through the quick action button or by typing
/markerin chat, so you have timestamps before you ever open an editor. - Turn on Auto Clips if you have alpha access and want Twitch to generate candidates automatically, or route your VOD into an AI clipper for the same effect.
- Run a 10-minute review pass to cut anything off-brand, mistimed, or legally risky before it goes anywhere near a caption template.
- Export vertical cuts with captions baked in and schedule them across platforms instead of dumping everything at once using AI tools for captions and scripts like those offered by AmmarAI.
That fifth step is where most creators lose consistency. Batching output across a week, rather than posting the moment a clip finishes rendering, keeps a feed active without turning every stream into a publishing scramble.
How Do Twitch’s Native Highlighter And Clips Actually Work?
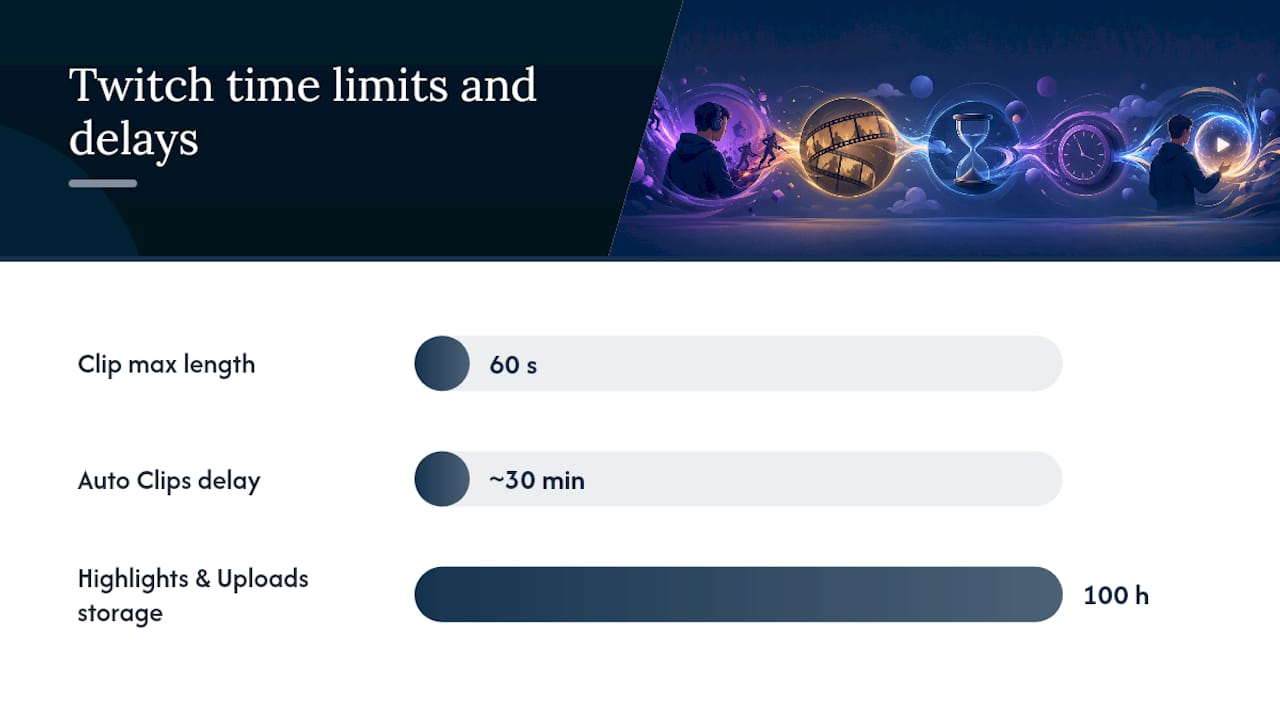
Clips and Highlights solve different problems, and mixing them up wastes editing time. A Clip is a short, shareable segment capped at 60 seconds, built for a single funny or hype moment. A Highlight is a longer, creator-curated compilation stitched together from multiple segments of a VOD, and that distinction, along with Twitch’s combined 100-hour storage limit for Highlights and Uploads, shapes how you should be capturing footage in the first place.
Markers are the backbone of multi-segment editing. You can drop one during a live broadcast using the quick action button or by typing /marker in chat, and each marker lands directly on the Highlighter timeline once your VOD processes. From there, you trim segment start and end points, string several together into one Highlight, and publish straight from the Highlight Queue.
- Clips: capped at 60 seconds, ideal for single reaction moments.
- Highlights: multi-segment, ideal for recaps, boss fights, or full story arcs.
- Markers: added live, visible on the Highlighter timeline after the stream ends.
- Auto Clips: an alpha feature that auto-generates and can auto-publish clips using speech-to-text and engagement signals, producing output within roughly 30 minutes of stream end, according to Twitch’s Auto Clips documentation.
Auto Clips requires VODs and Clips enabled and is currently invite-only, so treat it as a bonus layer rather than your core plan until wider access rolls out.
What Do AI Clipping Tools Actually Automate?
AI clippers do the heavy lifting Twitch’s native tools were never built for: full-VOD scanning instead of manual scrubbing. Most tools transcribe audio, track volume spikes and chat activity, then score moments against those signals to rank candidates before you ever open a timeline.
Turnaround is fast. According to Ssemble’s clipping guide, a typical VOD returns finished, vertically cropped, captioned candidates in 2 to 15 minutes depending on length. Other services push further into full automation.
- Vertical crops sized for TikTok, Shorts, and Reels are generated automatically alongside the horizontal source.
- Captions get burned in or exported as editable files depending on the tool.
- Some pipelines, like AutoClip, monitor a channel continuously and auto-clip new broadcasts without you touching an upload button.
- Candidate counts scale with VOD length, typically returning a handful for a short session and well over a dozen for a marathon stream.
None of that replaces your judgment. AI scoring flags loud moments and fast chat, but it cannot tell the difference between hype and someone’s copyrighted track playing in the background, or a joke that reads fine live and terrible out of context.
Pro Tip: Run your first VOD through a tool manually before automating anything. Compare its top five candidates against what you’d have clipped yourself. If it’s catching the right moments, then automate the pipeline; if not, you’ll save more time fixing your prompt or settings than fixing bad output later.
Step-By-Step: From Pre-Stream Setup To Scheduled Export
Pre-stream. Enable “Store past broadcasts” and “Always publish VOD” in your dashboard, confirm Clips is turned on, and decide your portrait crop preference now rather than mid-edit later.
During the stream. Drop a marker the instant something clip-worthy happens, either the quick action or /marker in chat, and add a short spoken or typed note so an editor knows what they’re looking at without rewatching ten minutes of footage.
Right after you go offline. Kick off Auto Clips if you have access, or send the VOD straight into your AI clipper of choice. If you’d rather build Highlights manually, open the Highlighter and start stitching marker-tagged segments together.
The 10-minute review. This is non-negotiable. Confirm each clip makes sense without stream context, trim dead air at the start and tail, cut any copyrighted music playing over the moment, and add captions plus your branding overlay.
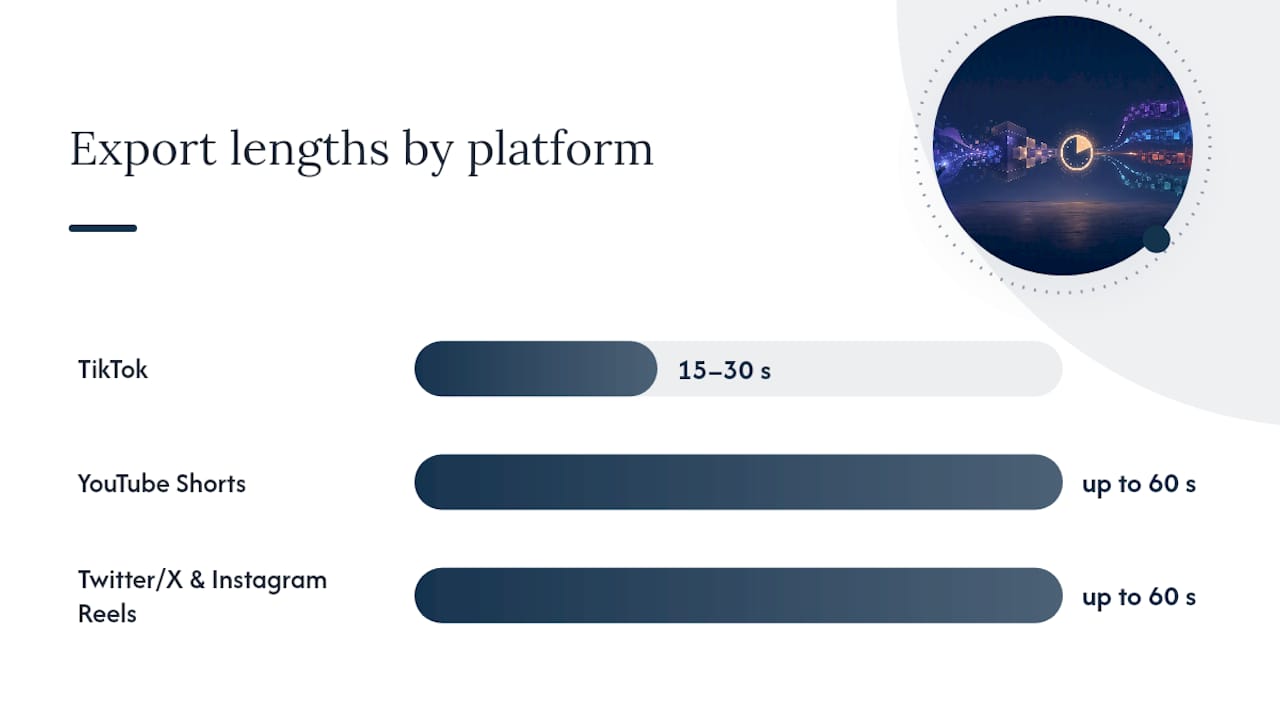
Export formatting. Match the platform, not a one-size file:
- TikTok: 9:16 vertical, 15 to 30 seconds.
- YouTube Shorts: 9:16 vertical, up to 60 seconds.
- Twitter/X and Instagram Reels: 9:16 preferred, similar length range to Shorts.
Pro Tip: Edit the first two seconds differently for each platform instead of reposting an identical file everywhere. A hook that works on TikTok’s algorithm often falls flat on Shorts, and testing full-sentence captions against punchy fragment captions on the same clip will show you which style holds retention on that specific platform.
What Storage And Copyright Limits Should You Plan Around?
Twitch caps combined Highlights and Uploads storage at 100 hours, which sounds generous until a few seasons of weekly Highlights quietly eat into it. Build a monthly habit of deleting stale Highlights and downloading anything worth archiving before that ceiling forces your hand.
- Delete outdated or low-performing Highlights on a monthly cadence.
- Download and back up anything with long-term value before trimming.
- Review every clip for copyrighted music or third-party content before publishing.
- Check a fellow streamer’s clipping policy before repurposing footage from a collab or raid.
Timing matters more than most creators expect. Event-driven clips, drama, big wins, unexpected chat moments, lose most of their pull within roughly 48 hours, so same-day posting is worth the rush. Evergreen tutorial or funny-moment clips carry no such deadline and can sit in a scheduling queue for weeks.
Choosing Between Twitch-Only, A Mixed Pipeline, Or A Dedicated AI Tool
The real decision is control versus speed. Twitch-only workflows give you full curation but demand your time for every step. A dedicated AI pipeline trades some control for volume, publishing candidates faster than you could manually scrub a two-hour VOD.
- Decide whether you want instant publish or a curated, brand-safe queue before picking a tool.
- Weigh processing speed against caption accuracy, since faster tools sometimes sacrifice transcription quality.
- Check vertical crop quality specifically, since a bad automated crop can cut off game UI or your facecam.
- Compare scheduling and cross-platform integrations if batching output matters to your posting cadence.
- Look at the pricing model, whether it’s per-clip, subscription, or usage-based, before committing long term.
Run one VOD through a candidate tool and compare three of its outputs against how you’d have manually edited the same moments. If it saves real time without losing quality, it earns a spot in your rotation.
When Automation Should Give Way To A Real Editor
Automation is a curation step, not a replacement for judgment. Tools surface candidates. You still make the brand call on what actually goes out. That’s the whole logic behind the 10-minute review, and it’s why a fully hands-off pipeline eventually produces a clip you regret.
Hire an editor once volume outpaces your review time, generally somewhere past a handful of clips per week, or once your content leans on tight comedic timing that automated crops routinely botch. Techvideoblog’s hands-on tests of AI highlight tools exist for exactly this decision point: checking caption accuracy, crop quality, and real turnaround before you commit budget to a subscription.
— H
Where To Find Tested Tools Before You Commit
Every AI clipper is evaluated through the same lens: real turnaround time, caption accuracy, and whether the vertical crop actually holds up, not marketing copy. That’s the gap between a tool that promises automation and one that saves you a genuine hour per stream.
If you’re deciding between a fully automated pipeline and a manual Highlighter workflow, start with Techvideoblog’s tested picks for gaming highlight tools rather than guessing from a landing page. Most of the tools worth testing offer free trials, so run one VOD through before you subscribe to anything. For cross-posting once your clips are cut, the YouTube Shorts formatting guide covers export settings you’ll want dialed in before your first scheduled batch goes out. Check current pricing and feature comparisons at Techvideoblog before you pick a plan.
FAQ
How Do I Make Twitch Highlights?
Open the Highlighter after your VOD processes, select segments (using any markers you dropped live as start points), trim each one, then publish from the Highlight Queue.
What’s The Difference Between Twitch Highlights And Clips?
Clips are short, shareable segments capped at 60 seconds, while Highlights are longer, multi-segment compilations you curate from a full VOD.
How Long Do Highlights Stay On Twitch?
Highlights count against a combined 100-hour storage limit shared with your Uploads, so older ones need to be deleted or downloaded once you approach that ceiling.
How Many Viewers Do I Need To Earn $1,000 A Month On Twitch?
There’s no fixed viewer count tied to a specific dollar figure since earnings depend on subscriptions, ads, and sponsorships rather than concurrent viewers alone; a consistent, engaged audience matters more than raw numbers.
Can AI Tools Fully Replace Manual Highlight Editing?
No. AI clippers speed up candidate discovery and formatting, but a short human review pass still catches copyright issues, bad context, and off-brand moments that automated scoring misses.