The fastest way to remove filler words is to run your audio or video through an AI transcript-based tool that flags every “um,” “uh,” and “like,” lets you review each hit, then renders clean cuts with a short crossfade so the edit doesn’t sound chopped. Casual speech runs roughly 3 to 8% filler words once you strip a transcript down, and manually hunting through a 40-minute podcast for every one of those instances is not a realistic use of your editing time. Tools built on Whisper-style word-level timestamps find them in seconds.
Here’s the quick sequence to try right now:
- Upload the file or paste an existing transcript into a filler-word remover.
- Scan the flagged list and deselect anything the tool got wrong.
- Render with crossfades enabled so cuts don’t pop or clip a breath.
Key Takeaways
An AI transcript-based workflow, paired with a manual review step and crossfaded cuts, is the most reliable way to remove filler words without sacrificing natural pacing.
| Point | Details |
|---|---|
| Detection layer | Word-level timestamps from transcription models locate fillers precisely before any cutting happens. |
| Review before render | Every credible tool, including Descript, recommends previewing flagged words before applying removals. |
| Crossfades prevent harsh cuts | Short 10 to 20ms crossfades keep automated trims from sounding choppy or abrupt. |
| Match tool to workflow | Single-episode podcasts, batch short-form clips, and DAW finishing each favor different tools. |
| Techvideoblog’s role | Techvideoblog verifies pricing and tests real workflows across tools like Descript and Cleanvoice AI so creators skip the trial-and-error phase. |
Where to Go Deeper on Filler-Word Removal
- Descript’s Remove filler words guide for exact UI steps and preview controls.
- Hearably’s technical explainer on Whisper-based timestamping and crossfade parameters.
- Hugging Face’s Remove Silence demo for experimenting with cut margins before applying changes at scale.
- Start with the official docs to learn the interface.
- Use the Hugging Face demo to test parameters hands-on.
Table of Contents
- How to Remove Filler Words With the Right Tool for Your Workflow
- How Does Automatic Filler-Word Detection Actually Work?
- What’s the Exact Workflow for Removing Filler Words From a Podcast or Video?
- How Do You Avoid Harsh, Choppy Cuts?
- When Should You Delete, Keep, or Replace a Filler Word?
- Which Filler-Word Remover Should You Try First?
- What’s a Quick Checklist for Choosing a Filler-Word Remover?
- Can You Remove Filler Words Without Any AI Tool?
- What Filler Words Should You Actually Be Removing?
- How Do You Customize AI Detection for Your Own Speaking Style?
- What Should You Do After Removing Filler Words?
- What Conventional Advice Gets Wrong About Filler Removal
- A Different Way to Approach Your Filler-Word Workflow
- Sources
- FAQ
How to Remove Filler Words With the Right Tool for Your Workflow
Not every filler remover fits every workflow, and picking based on price alone usually backfires once you factor in render time or missing DAW export options. A single-episode podcaster and a short-form editor batching twenty clips a week need different things from the same category of tool.
| Tool | Best for | Platform | Control over edits | Language/accuracy | Cost model |
|---|---|---|---|---|---|
| Descript | Text-based video editing, single-episode podcast polish | Desktop, web | Full preview, undo, custom filler lists | High, transcript-driven | Free tier, subscription |
| Cleanvoice AI | Batch cleaning, multi-track podcasts | Web, cloud | Context-aware review before export | Strong across multiple languages | AI credits, subscription |
| Hearably | Privacy-focused quick edits | Browser | Timestamped preview | Local Whisper-based | Free/limited use |
| CapCut | Short-form video, caption-driven cleanup | Desktop, mobile, web | Filter and review flagged words | Caption accuracy varies by accent | Free tier, subscription |
| OpusClip | Batch short-form repurposing | Web | Limited manual fine-tune | Good on clear audio | Subscription |
| Otter.ai | Meeting/interview transcripts | Web, mobile | Transcript editing only | Strong for English speech | Free tier, subscription |
| Adobe Premiere Pro | DAW-adjacent, professional finishing | Desktop | Full manual control, no auto-remove | Depends on plugin/transcript source | Subscription |
| Kapwing | Web-based video cleanup | Web | Preview and manual adjust | Moderate | Free tier, subscription |
| Riverside.fm | Recording plus post-production for podcasts | Web | Preview before export | Strong | Subscription |
| Auphonic | Audio leveling paired with cleanup | Web, API | Automated with export controls | Good for clean audio | Free tier, usage-based |
| Recut | Fast rough-cut filler removal | Web | Preview, basic undo | Moderate | Subscription |
| Fireflies.ai | Meeting transcription with filler flagging | Web | Transcript-level review | Strong for calls | Free tier, subscription |
If you’re polishing one podcast episode, start with a transcript-driven tool like Descript. If you’re batching short-form clips all week, a tool built around caption filtering, like CapCut, saves more time. DAW-first editors finishing in Premiere Pro will still want a transcript tool upstream to flag fillers before touching the timeline.
How Does Automatic Filler-Word Detection Actually Work?
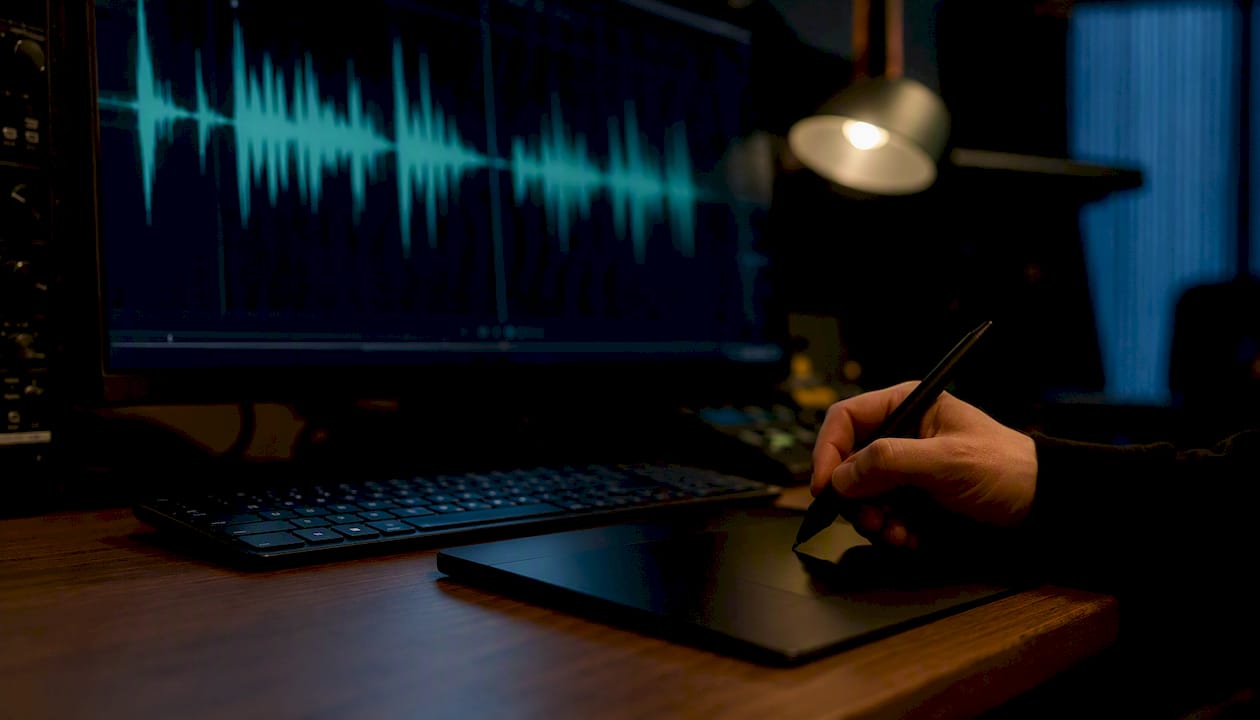
Detection starts with a word-level transcript. Whisper-style models generate precise timestamps for every spoken word, which gives the tool exact start and end points to work with instead of guessing where a sound begins.
From there, pattern matching filters real fillers from lookalikes. The word “like” used as a filler (“it was, like, really loud”) reads differently than “like” used as a verb (“I like this take”), and accuracy on that distinction varies by model, accent, and even punctuation in the transcript.
Removal itself uses those timestamps to cut a precise region, then applies a short crossfade, typically lasting around a few tens of milliseconds, so the splice doesn’t pop. Error modes show up around fast speech, overlapping dialogue, or heavy accents, which is exactly why every credible tool builds in a review step before rendering.
Pro Tip: Run a 60 second sample clip through any new tool before trusting it on a full episode. That’s the fastest way to see how it handles your specific voice and speaking pace.
What’s the Exact Workflow for Removing Filler Words From a Podcast or Video?
Podcast workflow:
- Transcribe the episode, either locally or through a cloud tool like Youtube Transcribe | YumiLM — AI Transcription and Insight G.
- Run filler-word detection against the transcript.
- Review every flagged hit in context, not just the word list.
- Accept the clean removals and deselect anything ambiguous.
- Render with crossfades enabled.
- Finish with pacing and EQ adjustments before export.
Video workflow:
- Generate captions or a full transcript first.
- Sync detected fillers to the timeline.
- Preview in full-screen playback to check lip-sync isn’t broken.
- Export, then relink captions if the edit shifted timing.
Browser-based options like Hearably run transcription locally, which matters if you’re editing client audio you’d rather not upload anywhere. Render time scales with file length, but most tools process a 30-minute episode in a few minutes once detection is done, since the actual cutting is lightweight compared to transcription.
How Do You Avoid Harsh, Choppy Cuts?
Harsh cuts happen when a tool trims too tight against a word boundary or removes a breath the speaker needed for natural rhythm. Listen for a sentence that suddenly speeds up or a breath that vanishes mid-thought. Both are signs the cut margin was too aggressive.
A few fixes work reliably:
- Extend the cut margin by a few milliseconds on each side of the flagged word.
- Use a raised-cosine crossfade around 10 to 20ms rather than a hard cut.
- Leave small breaths in place when they’re carrying the speaker’s natural rhythm.
- Keep a handful of conversational fillers if the content leans casual. Cleanvoice’s context-aware approach even inserts room-noise silence in place of a removed word so the track doesn’t sound artificially dead.
Pro Tip: If a cut sounds off, it’s almost always the crossfade length, not the tool’s detection accuracy. Widen it before you assume the tool made a mistake.
When Should You Delete, Keep, or Replace a Filler Word?
Delete without hesitation: unambiguous hesitation markers like “um,” “uh,” and “hmm” in scripted or polished content. These rarely add anything and removing them is close to risk-free.
Keep or soften: conversational fillers that carry style, like “like” used as emphasis, or a rhetorical “so” that opens a sentence with intent. Stripping every one of these can leave a voiceover sounding stiff and over-produced.
Replace or re-record: when removing a filler breaks meaning, timing, or lip-sync in video. Your options here are rephrasing the line, doing a quick ADR pickup, or a short rewrite that avoids the awkward gap entirely rather than papering over it with a cut.
Which Filler-Word Remover Should You Try First?
Based on hands-on workflow testing across podcast and video editing, three picks cover most creators:
- Descript for single-episode podcast polish and text-based video editing, thanks to a tight transcript-to-timeline workflow and custom filler lists that adapt to your speech patterns.
- Cleanvoice AI for batch cleaning across multi-track podcast sessions, where context-aware removal and inserted room noise keep long-form audio sounding natural.
- Hearably for privacy-conscious quick edits, since transcription runs locally in the browser instead of uploading audio anywhere.
| Pick | Strongest for | Caveat |
|---|---|---|
| Descript | Podcast polish, video text-editing | Full features sit behind paid tiers |
| Cleanvoice AI | Multi-track batch cleanup | Priced on AI credits, so heavy use adds up |
| Hearably | Local, privacy-first editing | Fewer advanced controls than cloud tools |
These picks come out of Techvideoblog’s hands-on reviews and pricing verification process, not marketing copy. Fit matters more than feature count here.
What’s a Quick Checklist for Choosing a Filler-Word Remover?
Run through this before committing to a subscription:
- Platform compatibility with your existing editing setup.
- Control level, specifically preview and undo before anything renders.
- Transcript accuracy, ideally word-level timestamps rather than rough captions.
- Language and accent support that matches your actual speakers.
- Cost model: flat subscription, free tier limits, or AI credits that burn fast on longer files.
- Export options and whether captions relink automatically after edits.
- Privacy model: local browser processing versus cloud upload.
Test any tool on a short sample clip first. Check the detections, preview the edit, export caption timing, and note the render time before trusting it on a full episode.
Watch for pricing traps. AI-credit models can feel cheap until a single hour-long recording burns through a month’s allowance, and some tools cap upload length on free tiers without making that obvious upfront.
Can You Remove Filler Words Without Any AI Tool?
Yes, and for short clips it’s still a viable option. Open your transcript or waveform and scan visually for repeated spikes in the same spot, which is often where a hesitation sound sits. Most editors, including Adobe Premiere Pro, let you zoom into the waveform far enough to spot the short, low-amplitude blips that “um” and “uh” typically produce.
The manual process looks like this: play back at a reduced speed, mark every filler with a timeline marker as you hear it, then go back and trim each one with a small crossfade applied by hand. It’s slower, but it gives you full control over every cut, which matters for delicate audio where an automated tool might misjudge context.
Reading along with a printed or on-screen transcript while listening speeds this up considerably, since your eyes catch “like” and “you know” faster than your ears alone. Some editors count filler words as a separate revision pass entirely, doing it after picture edits are locked so they’re not second-guessing pacing decisions while also hunting for fillers.
The tradeoff is time. A 20-minute interview might take an hour or more to clean manually versus a few minutes with a detection tool, so manual removal makes the most sense for short cold opens, single sound bites, or projects where an AI tool simply isn’t available.
What Filler Words Should You Actually Be Removing?
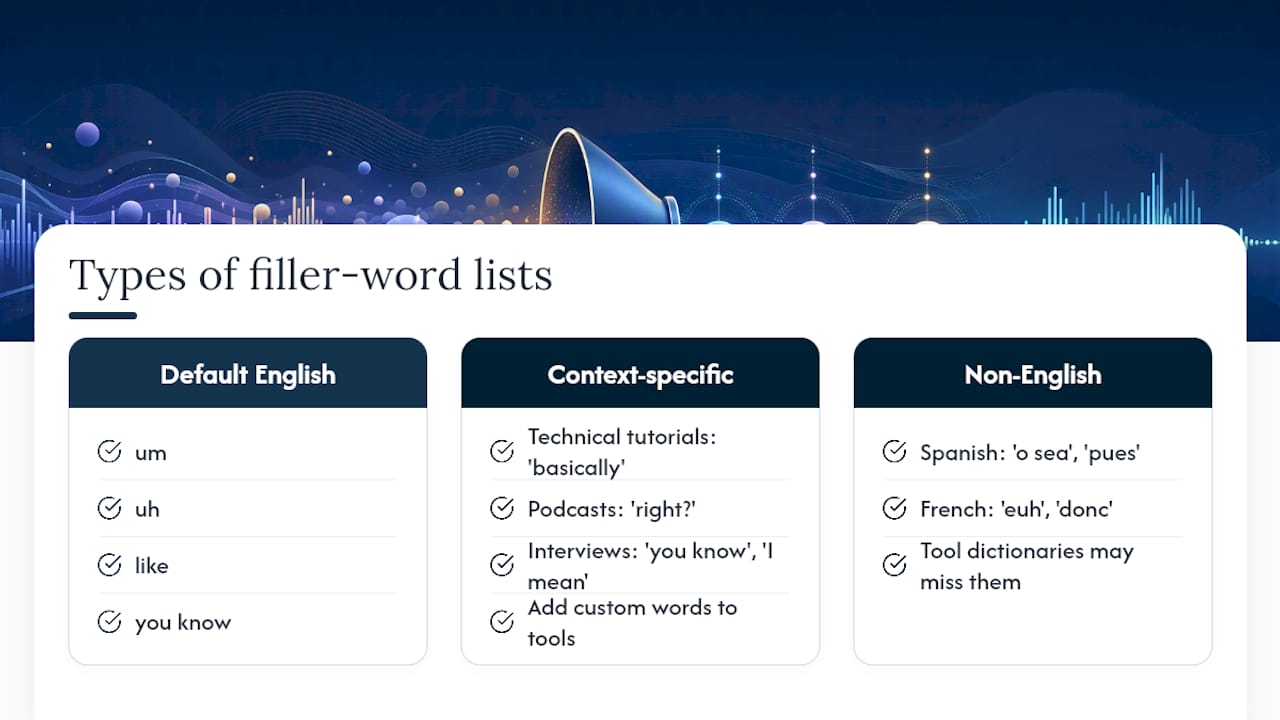
English filler words cluster around a predictable set: “um,” “uh,” “like,” “you know,” “so,” “actually,” “basically,” and “I mean.” Most detection tools ship with a default dictionary covering these, and Descript specifically lets you add custom filler words to that list, which matters if your speech has personal tics the default set misses.
Context changes the list considerably. A technical tutorial creator might overuse “basically” as a transition word. A conversational podcast host might lean on “right?” as a verbal tic that doesn’t register as a classic filler to most tools. Interview-style content tends to surface more “you know” and “I mean” than solo narration does, simply because those phrases function as conversational bridges between speaker turns.
Non-English content shifts the list entirely. Spanish speech commonly features “o sea” and “pues” as filler equivalents. French speakers use “euh” and “donc” in similar hesitation roles. If you’re editing multilingual content, check whether your tool’s dictionary actually covers your language, since a filler remover trained mostly on English speech patterns will miss most of these outright.
The practical move is auditing your own speech pattern once. Transcribe a few minutes of your unscripted talking and see what repeats. That’s your real filler list, and it’s usually more specific than any generic tool default.
How Do You Customize AI Detection for Your Own Speaking Style?
Most tools worth using let you extend the default filler dictionary rather than relying only on the built-in list. Descript’s custom filler word feature is the clearest example: you add your own recurring phrase, and it gets flagged the same way “um” would be.
Start by transcribing a representative sample of your unscripted talking, ideally five to ten minutes of natural speech rather than a scripted intro. Read through it and mark every phrase that repeats without adding meaning. That list becomes your custom dictionary entry.
Accent and speaking pace also affect detection accuracy. If a tool consistently misses or mislabels your fillers, the issue is often pace-related. Fast talkers tend to blend filler sounds into adjacent words, which throws off word-level timestamp alignment. Slowing your test clip down slightly before running detection can improve hit rates on tools that struggle with rapid speech.
Review your flagged results over a few episodes rather than trusting the first pass blindly. Detection accuracy on personal speech patterns tends to improve as you refine your custom word list based on what the tool consistently gets wrong, not what it gets right.
What Should You Do After Removing Filler Words?
Filler removal is rarely the last edit you make. Pacing usually needs a second pass afterward, since removing several fillers in a row can leave a sentence sounding unnaturally fast even when each individual cut was clean.
Listen back at normal speed, not just during the review step, and flag any section where the rhythm feels off. Small pauses sometimes need to be added back in manually, particularly at sentence boundaries where a filler used to sit.
Crossfade consistency matters across the full episode, not just on individual cuts. If you switched settings partway through editing, go back and check that transitions sound uniform from start to finish. Auphonic and similar audio leveling tools work well as a final pass here, evening out volume and tone after the structural edits are done. For video, re-check lip-sync on every cut near a face shot, since even a clean audio edit can drift slightly out of sync with picture once you’re several removals deep into a scene.
What Conventional Advice Gets Wrong About Filler Removal
Most guides treat filler removal as a binary: detect it, delete it, done. That framing undersells the actual skill involved, which is judgment about what to leave alone. The research on context-aware detection makes clear that “like” and “so” carry different weight depending on whether they’re structural fillers or rhetorical choices, and no tool fully resolves that distinction without a human review pass.
The bigger blind spot is treating automated removal as a finishing step rather than a first draft. A transcript tool gets you 90% of the way in a fraction of the time, but the pacing check afterward, the crossfade consistency, the decision to keep a breath here and cut one there, that’s where a recording actually starts sounding professional instead of just clean.
Creators who skip that second pass end up with audio that’s technically filler-free but rhythmically flat. Prioritize the review step over the detection step. The tool finds the fillers; your ear decides which ones actually needed to go.
A Different Way to Approach Your Filler-Word Workflow
You’ve now got a real comparison across Descript, Cleanvoice AI, Hearably, and the rest, plus the manual technique if you’d rather skip software entirely. Where Techvideoblog fits differently is in the decision layer above all of it: instead of testing each tool yourself over several editing sessions, Techvideoblog’s hands-on reviews and verified pricing checks have already done that legwork.
That matters most if you’re choosing between a subscription and an AI-credit model without knowing your real monthly usage. Techvideoblog’s workflow tests for podcasters cover exactly that tradeoff, and the transcript and captioning comparisons help you match a detection engine to your accent and speaking pace before you commit to a plan. If your next step is repurposing a cleaned-up episode into short clips, the podcast clip tool guide picks up right where filler removal leaves off. Start there, compare verified pricing side by side, and pick the tool that fits your actual workflow instead of guessing from a features page.
Sources
- Remove filler words
- Filler Word Remover — Remove ‘Um’ and ‘Uh’ from Audio Online
- AI Filler Word Remover — Cut the Umms & Ahhs | Cleanvoice AI
- Remove Silence From Audio – a Hugging Face Space by NeuralFalcon
FAQ
What Should You Replace Filler Words With?
In most cases, nothing. A short crossfade or a preserved breath fills the gap naturally; adding a replacement word usually sounds more artificial than a clean cut.
How Do You Get Rid of Fillers in Speech While Recording?
Slowing your speaking pace and pausing silently instead of filling gaps with “um” reduces fillers at the source, though most creators still run a cleanup pass afterward since old habits are hard to break in the moment.
Does Removing Filler Words Actually Improve a Recording?
Yes. Cutting fillers tightens pacing and can reduce overall word count by 3 to 8% in written transcripts, which usually translates to a noticeably tighter listen or watch.
Can You Remove Filler Words From a Video Without Breaking Lip-Sync?
Careful margin control and a full preview pass before export are what prevent that. Watching the edit at full-screen playback, not just listening to the audio, is the only reliable way to catch a sync issue before you render.
Which Tool Is Best for a Beginner Trying This for the First Time?
Descript is a reasonable starting point because its transcript-driven interface shows you exactly what you’re cutting before you commit, which builds the review habit that matters more than the tool itself.