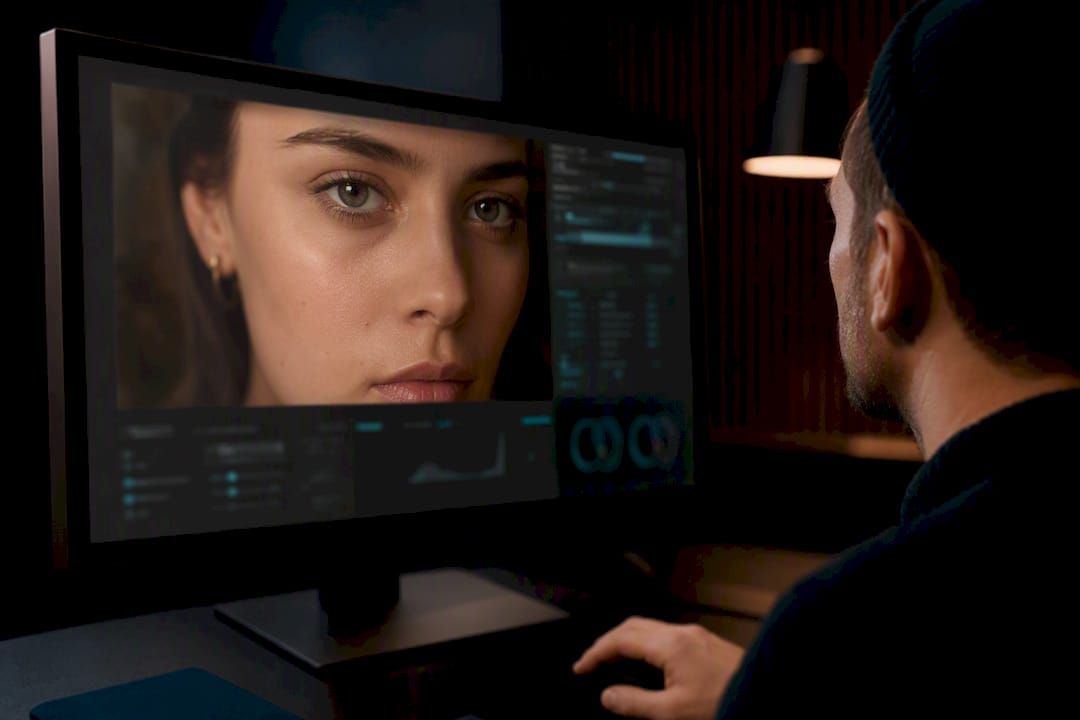
Yes, you can smooth skin convincingly in video, and the fastest route is an AI video retouch tool or your editor’s built-in skin-smoothing effect set to a low strength with a motion preview before you commit. Save Photoshop and frame-by-frame frequency separation for single-frame fixes or high-end portrait work where you need pixel-level control.
TL;DR:
- Temporal tracking tools like Evoto Video and Tembrica provide more stable and natural-looking skin smoothing in motion than static-frame filters.
- In quick edits, setting a low smoothing strength and masking regions can achieve convincing results without over-softening.
- Manual frequency separation in Photoshop offers the highest control but requires more time and expertise, making it ideal for high-end retouching.
- In-motion previews are essential to detect flicker, haloing, or tracking errors, which can be fixed by adjusting effect settings or masking problematic frames.
- For social clips or fast turnaround projects, using online filters like CapCut at conservative strengths can be effective, but avoid high settings that flatten textures or create halos.
Table of Contents
- Which Tools Actually Handle a Skin Smoothing Video Well?
- How Do You Actually Smooth Skin in a Video, Step by Step?
- How Do You Keep Skin Looking Real, Not Airbrushed?
- What’s the Fastest Way to Finalize a Clip Without Flicker?
- What Techvideoblog Found Testing These Tools
- A Note on Taste, Consent, and Editing Other People’s Faces
- Where to Compare Skin Smoothing Tools Before You Commit
- Sources
- FAQ
Which Tools Actually Handle a Skin Smoothing Video Well?
Pick the tool based on what you’re shooting, not on which one has the flashiest demo reel. A talking-head interview series has different needs than a 12-second vertical clip, and the five product classes below split cleanly along those lines.
- Evoto Video builds retouching around per-slider control and temporal tracking, so a correction applied on frame one holds steady as the subject turns their head or the lighting shifts. It’s built for batch work: teach it on a handful of frames, save the preset, and apply it across a whole episode without re-tuning each clip.
- Descript folds a skin-smoothing effect directly into its timeline editor, with a strength slider and region controls so you’re not smoothing a whole frame just to fix one cheek. If you’re already cutting a podcast or interview in Descript, this is the path of least resistance.
- Tembrica leans on a “check in motion” preview and mid-frequency smoothing that targets tone without flattening texture. It also reports how many frames it successfully recognized a face in, which matters more than most creators realize once a subject turns in profile.
- Adobe Photoshop, using Neural Filters or manual frequency separation, remains the standard for single-frame, high-end retouching where tone and texture need to be handled as separate problems.
- CapCut and OpenArt offer one-click or slider-based online filters built for speed. They’re the right call for a social-first clip you need out the door in minutes, as long as you keep the strength conservative.
None of these is universally “best.” Evoto and Tembrica exist specifically because temporal stability, keeping a fix locked in as the subject moves, is the hardest problem in video retouching, harder than in a still photo. Descript and the online filters trade some of that control for speed. Photoshop trades speed for total control over a single frame.
How Do You Actually Smooth Skin in a Video, Step by Step?
Three workflows cover almost every situation you’ll run into. Pick the one that matches your tool access and deadline.
Quick editor fix (Descript, CapCut, similar):
- Add the skin-smoothing effect to the clip.
- Set strength low, at a modest level rather than the default.
- Use region controls to limit the effect to the face rather than the whole frame.
- Render a short 3 to 5 second proof clip.
- Watch it at normal playback speed, not paused, before touching anything else.
AI retouch flow (Evoto, Tembrica):
- Select a handful of representative frames, different angles, different lighting, so the face-tracking model has enough to work with.
- Run the retouch pass using a textured-smoothing mode rather than a flat blur.
- Preview in motion before you trust the result.
- Save the settings as a preset and apply it across the batch.
- Run the final render.
Manual fallback (Photoshop, frequency separation):
- Pick the representative frames that need the most work.
- Split the image into a low-frequency layer (tone and color) and a high-frequency layer (fine texture), the core technique behind natural-looking frequency separation.
- Smooth only the low-frequency layer. Leave the high-frequency layer alone or touch it up with cloning, never blur.
- Mask and blend the two layers back together, adjusting opacity until it looks right, not until it looks smooth.
Pro Tip: Export your working file in a high-bitrate interim codec like ProRes or DNxHR before your final compression pass. Heavy compression exaggerates smoothing artifacts that looked fine in your edit but that turn blotchy or waxy once compressed for delivery.
How Do You Keep Skin Looking Real, Not Airbrushed?
The single rule that separates a convincing skin smoothing video from an obviously fake one: smooth the tone, not the texture. That’s the entire logic behind frequency separation, splitting an image into a tone layer and a texture layer so you can even out blotchiness and redness without erasing the pores and fine detail that make skin look like skin.
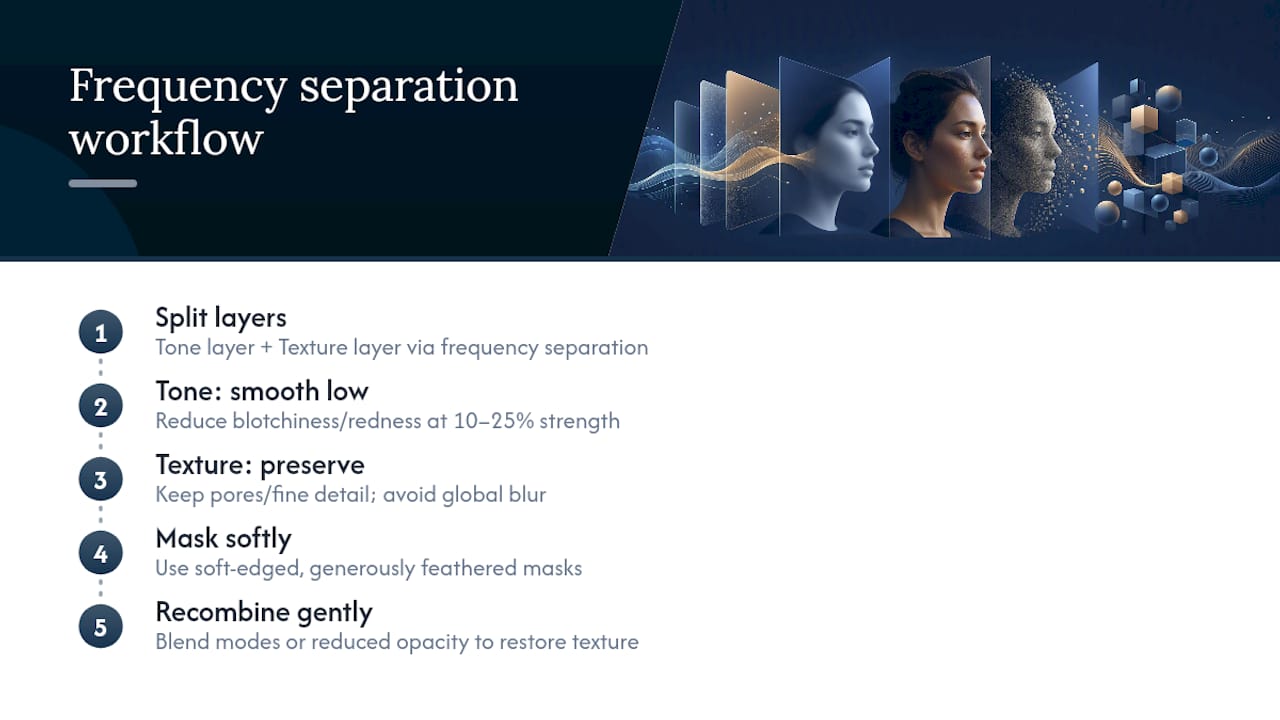
In practice, that means keeping your blur or smooth sliders low, starting around 10 to 25 percent rather than whatever the software defaults to, and choosing textured-smoothing modes over global blur filters whenever the tool offers one. Soft edge masks with generous feathering also matter more than most people expect. A hard-edged mask creates a visible seam between smoothed skin and untouched hair or background.
Watch for three red flags: pores disappearing entirely, highlights going flat and shiny, and haloing at the edges of the face. Each has the same fix. Pull the strength back and, where your tool allows it, reintroduce a bit of the original texture layer through blend modes or reduced opacity. Adobe’s own documentation on its Smooth Skin quick action warns that Neural Filters can over-soften texture when applied globally, which is exactly why manual frequency separation still beats one-click filters for anything shot in close-up.
What’s the Fastest Way to Finalize a Clip Without Flicker?
A workable checklist gets you from raw footage to a finished, artifact-free clip without guesswork.
- Choose your tool based on the use case (batch series, quick social clip, or single high-end shot).
- Set a conservative smoothing strength before you touch anything else.
- Apply region masks so the effect stays on the face.
- Preview the result in motion, not as a static before-and-after.
- Render a short segment, not the full clip, to test.
- Inspect that segment close-up and at normal playback speed.
- Adjust sliders based on what you actually saw, not what you expected to see.
- Export using a high-bitrate interim codec before final delivery compression.
Flicker, haloing, and tracking dropouts are the three problems that show up almost every time, and each has a known fix. Flicker usually means the face-tracking sample size was too small. Increase it, or turn on temporal smoothing if your tool offers it. A face that drops out of tracking for a few frames, often when the subject turns sharply, needs those frames masked manually or excluded from the batch pass. Haloing at the jawline or hairline almost always means the feather radius or edge strength is set too aggressively. Tembrica’s own documentation notes that static before-and-after stills can hide exactly this kind of temporal instability, which is the whole reason “check in motion” previews exist.
Your acceptance bar should shift with the platform. A little texture loss is genuinely fine for a fast-moving social clip nobody’s going to pause on. Broadcast or long-form interview work demands you preserve texture, because a paused frame at full resolution reveals every shortcut.
Pro Tip: Render your test segment at the same frame rate and resolution you’ll actually deliver. A smoothing pass that looks clean in a downscaled preview can reveal blotching or flicker once it’s rendered at full resolution.
What Techvideoblog Found Testing These Tools
Across hands-on runs with these tools, the AI-driven options with temporal tracking, Evoto Video and Tembrica in particular, held up noticeably better in motion than static-frame filters ever could. That’s the trade-off you’re paying for when you pick a dedicated video retouch tool over a photo filter repurposed for clips.
- Editor-integrated effects like Descript’s win on speed for quick touch-ups but need a conservative strength setting to avoid a waxy look on close-ups.
- Starting presets that worked well in testing: light strength for social shorts (roughly 10 to 15 percent), moderate for interview series (20 to 30 percent with region masking), and textured, minimal smoothing for polished portrait work paired with manual touch-ups on key frames.
- Manual retouch still beat every automated tool for hero shots, thumbnails, or any frame a viewer might pause on.
- Pricing transparency varied more than expected. Some tools bury credit limits behind a free tier that only becomes clear after you’ve built a workflow around them.
A Note on Taste, Consent, and Editing Other People’s Faces
Subtle smoothing earns its place when it evens out lighting inconsistencies or camera noise, not when it erases the texture that makes someone recognizable. The line between “polished” and “uncanny” is usually a strength slider set 10 percent too high.
If you’re editing footage of anyone other than yourself, get their consent before you retouch their face, and keep a record of the preset or settings you used. It protects you, and it respects the person whose likeness you’re altering. I’d rather see a creator under-smooth than turn a real person into a filtered version of themselves that their own friends wouldn’t recognize.
— H
Where to Compare Skin Smoothing Tools Before You Commit
Picking blind between Evoto, Tembrica, Descript, and a dozen online filters wastes hours you don’t have. Techvideoblog exists specifically so you don’t have to run that comparison yourself.

Hands-on tests on the tools in this guide track motion stability, texture preservation, and pricing rather than marketing copy, to help you see how a tool performs on real footage before you commit credits or a subscription to it. If you’re building out a broader editing setup, our breakdown of AI face blur tools and our tested picks for faceless YouTube workflows cover adjacent tools worth pairing with a good retouch pass. Visit the Techvideoblog directory to browse verified reviews and pricing for the tools mentioned in this guide, and find the one that fits your actual workflow instead of your assumptions about it.
Sources
For deeper technical grounding, the Impact Photography frequency separation tutorial explains the tone-versus-texture split in full detail, Adobe’s own Smooth Skin documentation covers Neural Filters’ limits, and Tembrica’s help docs walk through motion-preview testing. For broader context on where AI fits into production pipelines, see this editorial on AI-powered video editing.
- How to Retouch Skin in Photoshop: A Natural-Looking Frequency Separation Tutorial – Impact Photography
- Retouch a face in video online | Tembrica
- Smooth skin in your images — Adobe HelpX
FAQ
Can You Smooth Skin in a Video?
Yes. Dedicated tools like Evoto Video and Tembrica use temporal tracking to keep a smoothing effect stable frame to frame, while editors like Descript and CapCut offer a simpler adjustable-strength effect built into the timeline.
What Is the Best Video Skin Smoothing App?
There’s no single best option. Evoto Video suits batch retouching across multiple clips with consistent presets, Tembrica suits creators who want to verify results in motion before rendering, and Descript suits quick in-editor touch-ups during a normal edit session.
What Cameras Have Skin Smoothing?
Many smartphones and some mirrorless cameras include an in-camera “beauty mode” or skin-smoothing filter applied at capture, but these settings are typically fixed and offer far less control than editing the footage afterward with a dedicated tool.
Does CapCut Have a Skin Smoothing Filter?
Yes, CapCut offers a fast, slider-based skin-smoothing filter suited to quick social-first edits, though it works best at conservative strength settings to avoid an artificial look.