
If you publish shorts and single clips, start with a one-click web reframe tool. If you edit inside Premiere, use the built-in Auto Reframe effect. If you’re processing hours of footage daily, build on an API pipeline instead.
Volume is the deciding factor. A creator posting three TikToks a week needs speed and zero friction, not a developer console. An editor already living in a timeline wants reframing that respects existing cuts and lets them nudge keyframes by hand. A production team pushing hundreds of clips across platforms every day needs something that runs unattended, at scale, without a human clicking “export” each time.
- One-click web tools: platform-ready verticals in minutes, minimal control
- Desktop Auto Reframe (Premiere): strong manual override, keyframe-level tuning
- API/server-side pipelines: batch throughput, semantic focal lock across scenes
None of these is universally “best.” The Adobe Reframe API supports scene edit detection and focal-point locking specifically because high-volume teams need that persistence across cuts, something a single-clip tool rarely bothers to offer.
Key Takeaways
Matching the solution class (web app, desktop effect, or API) to your actual clip volume determines whether auto reframing saves time or creates rework.
| Point | Details |
|---|---|
| Match tool to volume | Web apps suit occasional single clips, Premiere suits editors, APIs suit daily batch output. |
| Test overlay handling first | Upload a clip with edge-tight text or a logo before trusting any tool’s default crop. |
| Enable scene detection | Without it, tracking drifts across cuts instead of resetting at each new shot. |
| Calculate cost per clip | Compare total cost at your real monthly volume, not advertised starting prices. |
| Keep manual override available | The best tools let you fix a bad automated guess instead of forcing a full re-render. |
Table of Contents
- Comparing Auto Reframe Video Tools By Workflow Type
- What Should You Check Before Choosing A Tool?
- How Do You Reframe A Clip For TikTok, Reels, And Shorts?
- How Techvideoblog Tests Auto Reframe Video Tools
- Which Aspect Ratios And Export Settings Actually Matter?
- How Fast Can These Tools Actually Scale?
- What Will Auto Reframing Actually Cost You?
- How Do The Leading Auto Reframing Tools Compare?
- Does Auto Reframing Actually Hold Up In Real Workflows?
- Where To Learn More About Auto Reframing Technology
- The Real Lesson From Testing These Tools Side By Side
- Sources
- FAQ
Comparing Auto Reframe Video Tools By Workflow Type
Auto reframing video tools split into three real categories, and picking the wrong one wastes more time than doing the crop manually. Web-based one-click tools are built for speed: upload, pick a ratio, download. Desktop effects like Premiere’s Auto Reframe live inside your existing edit, so they respect your cuts and let you fine-tune motion. APIs and transformation platforms exist for teams who need to process volume without touching a UI at all.
Cloudinary’s smart crop, for instance, exposes a gravity:auto parameter you can chain into cascading transformations, so one API call can resize, crop, and re-encode hundreds of clips in a batch job. That’s a different job entirely from a solo creator dragging a 30-second clip into a browser tool between meetings.
| Automation model | Semantic control | Aspect ratio support | Batch throughput | Overlay handling | Pricing shape |
|---|---|---|---|---|---|
| One-click web app | Low to moderate, usually automatic | 9:16, 1:1, 4:5 presets | One clip at a time, fast | Basic, may clip text/logos | Free tier or credit packs |
| Desktop plugin (Premiere) | High, manual keyframe override | Custom resolutions, any preset | Sequence-by-sequence | Manual fix via timeline | One-time app cost, included |
| API/server-side | High, semantic focal lock | Custom + multi-rendition | Bulk, scriptable | Configurable padding/letterbox | Usage-based, per-minute or per-call |
- Best for solo creators: a web tool, if you just need three or four verticals from one horizontal source
- Best for editors: Premiere’s Auto Reframe, since it duplicates your sequence and keeps your existing edit intact
- Best for agencies and production pipelines: an API, because it scales without adding headcount
Trial each category with the same source clip before committing. The differences show up fast once you compare outputs side by side.
What Should You Check Before Choosing A Tool?
Run through this checklist during any free trial, before you commit a subscription or build a pipeline around one vendor.
- Multi-rendition export. Can it output 9:16, 1:1, and 4:5 from a single source in one pass, or do you re-upload for each ratio?
- Scene detection. Does it recognize hard cuts and reset tracking, or does it drag one focal point across an unrelated new shot?
- Semantic focal points. Can you tell the tool to lock onto “person” or “product” rather than just the loudest motion in frame?
- Manual keyframe override. When the AI gets it wrong, can you nudge a keyframe, or are you stuck re-running the whole job?
- Overlay handling. Does it detect burned-in captions or logos near the frame edge before cropping through them?
Beyond features, check the vendor’s fine print: file size ceilings, how long uploaded footage is retained (and whether it’s used to train models), and for API users, the rate limits and authentication model. A tool that caps free uploads at 500MB or throttles API calls to five per minute will bite you the first time you actually need scale.
Pro Tip: Upload a clip with a logo tight against the frame edge during your trial. That single test exposes more about a tool’s overlay handling than any spec sheet.
Red flags worth walking away from: vague retention policies, no visible processing-time estimates, and marketing copy that never mentions scene detection at all. If a vendor can’t tell you what happens when your subject moves off-screen, they haven’t tested it either.
How Do You Reframe A Clip For TikTok, Reels, And Shorts?
This workflow works whether you’re using a browser-based reframer or Premiere’s built-in effect.
- Pick your target ratios first. Decide if you need 9:16 for TikTok and Reels, 1:1 for feed posts, or 4:5 for Instagram, before you touch the source file.
- Run the auto reframe pass. In Premiere, this duplicates your sequence and applies the Auto Reframe effect automatically; in a web tool, this is your upload-and-select step.
- Enable scene detection. This resets tracking at hard cuts so the crop doesn’t drag your subject across an unrelated shot change.
- Set focal points for multi-subject scenes. A two-person interview needs a locked focal target, or the frame will jump between speakers unpredictably.
- Inspect and smooth keyframes. Premiere’s motion presets (Slower, Default, Faster) tune how aggressively the crop reacts to movement, worth adjusting before you trust the output.
- Handle overlays manually. Add padding, a blurred background, or extend the canvas when captions or a logo sit close to the edge, since AutoFlip’s own fallback for content spread too wide is to switch to letterboxing or blurred padding rather than force a bad crop.
- Export multi-renditions and check codecs. Confirm resolution and bitrate per platform before publishing, not after.
Skipping step 3 is the single most common failure mode we see: creators run auto reframe once, across a multi-scene clip, and wonder why the crop drifts on every cut.
How Techvideoblog Tests Auto Reframe Video Tools
Techvideoblog runs the same source clip through every tool under review, exported to three target ratios, then measures four things: centering accuracy (does the subject stay framed, or drift toward jitter), overlay handling (does burned-in text survive the crop), batch processing time, and, where an API is involved, reliability across repeated calls.
The protocol is simple by design: one clip, three aspect ratios, a stopwatch, and a frame-by-frame check for jitter at scene cuts. It’s not sophisticated, but it exposes the gap between marketing claims and actual output fast.
Auto-reframing quality tends to come down less to raw AI sophistication and more to whether a tool gives you real focal control and an easy manual override when it guesses wrong.
- Web tools usually win on speed but lose points on overlay handling
- Desktop effects trade some automation for editor-level control over every keyframe
- APIs deliver the most consistent batch output but demand more setup before the first clip even renders
Weight these trade-offs against your actual workload, not the demo reel. A tool that looks flawless on a single talking-head clip can fall apart on b-roll with fast pans.
Which Aspect Ratios And Export Settings Actually Matter?
Every credible auto reframing video tool covers 9:16 for TikTok, Reels, and Shorts, 1:1 for feed posts, and 4:5 for Instagram’s portrait format. Custom ratios matter more than people expect, especially for YouTube thumbnails or client deliverables that don’t map to a standard social preset.
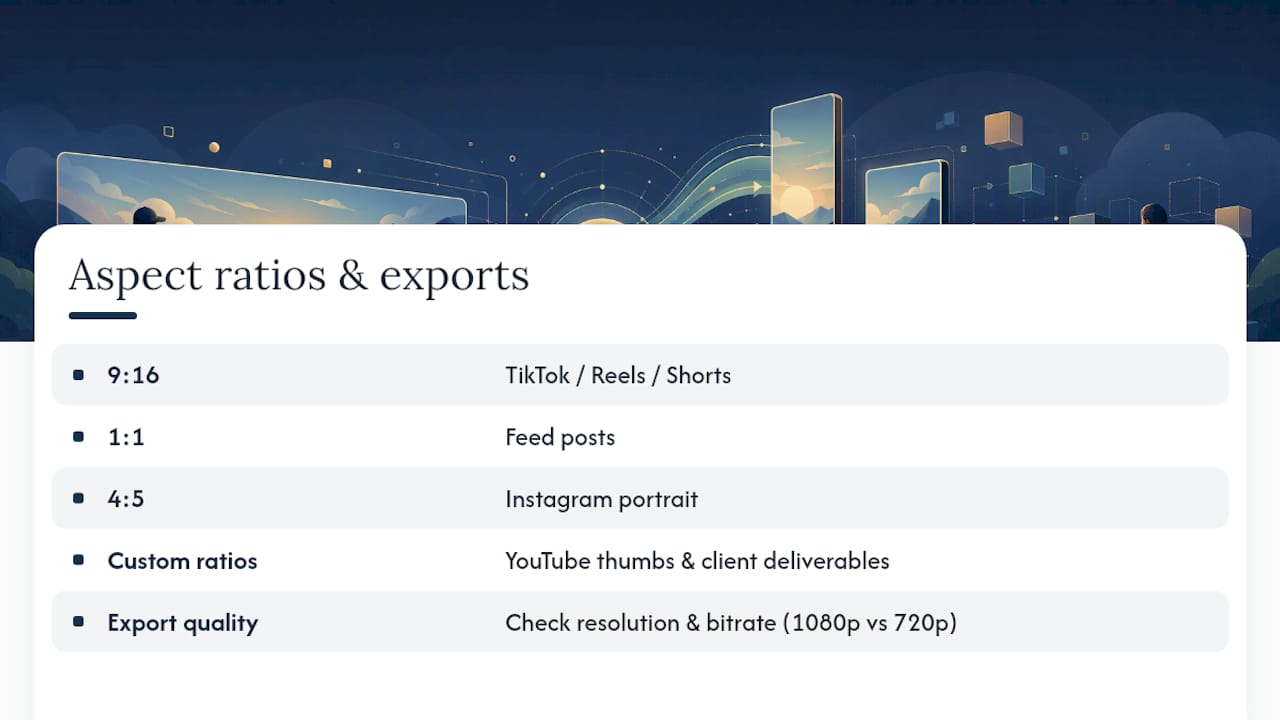
Export quality considerations go beyond the crop itself. Check the output resolution the tool defaults to, not just the aspect ratio. A 9:16 export at 720p looks noticeably softer than a native 1080p vertical render, and some web tools quietly downscale on free tiers. Bitrate matters just as much: a low bitrate export will show compression artifacts around fast motion or text overlays, even if the framing itself is perfect.
Multi-rendition output, generating several ratios from one source in a single pass, saves real time over re-uploading for each platform. Adobe’s Reframe API supports this natively, letting you specify exact pixel dimensions per rendition rather than relying on rough presets. If you’re publishing to five platforms from one source clip, that single-pass capability is worth prioritizing over a slightly sharper crop algorithm.
Always preview at 100% zoom before publishing. A crop that looks fine in a thumbnail preview can reveal cut-off captions or a partially cropped logo once viewed full-screen on a phone.
How Fast Can These Tools Actually Scale?
A single 30-second clip through a one-click web tool typically finishes in under a couple of minutes, which is fine if you’re posting once a day. That same tool starts to strain the moment you feed it a backlog of 50 clips, since most web interfaces process one file at a time with no queue management.
This is where the use-case split becomes obvious. Single-clip creators rarely need more than what a browser tool offers. Editors working inside Premiere get their scale from batching within a project, applying Auto Reframe across multiple sequences in one session rather than exporting one at a time.
High-volume production, agencies repurposing a full podcast catalog, brands pushing daily content across six platforms, needs something built for bulk from the ground up. Cloudinary’s transformation model handles this by chaining crop and resize operations into automated pipelines that don’t require a human touching each file. Adobe’s Reframe API works similarly, accepting pre-signed source URLs and returning multiple renditions per call, which matters when you’re processing hundreds of assets overnight rather than one clip between calls.
The practical test: if your weekly output is under ten clips, throughput won’t be your bottleneck. Past that, ask any vendor for real processing-time numbers under load, not just a demo with one file.
What Will Auto Reframing Actually Cost You?
Pricing for auto reframing video tools falls into three shapes, and total cost of ownership depends heavily on your volume, not just the sticker price.
Subscription-based web tools charge monthly for a set number of exports or minutes processed, which works well for predictable, moderate output. One-time-fee software, Premiere itself falls here since Auto Reframe is bundled into your existing Creative Cloud plan, avoids recurring cost entirely if you already own the license. API and transformation platforms usually charge per minute processed or per API call, which scales with usage but can get expensive fast if you’re not monitoring volume.
The trap most creators fall into is comparing sticker prices without factoring in overage costs. A credit-based web tool might look cheap until you blow through your monthly allotment mid-project and get hit with per-export surcharges. API pricing looks intimidating on a rate card but often works out cheaper per clip at real scale, since you’re not paying for a UI or a subscription tier you don’t fully use.
Before committing, calculate cost per finished clip at your actual monthly volume, not the vendor’s advertised starting price. That number tells you more than any feature comparison.
How Do The Leading Auto Reframing Tools Compare?
Opus Clip’s AI Reframe anchors the one-click category, built around turning long-form video into short, platform-ready clips with reframing handled automatically as part of that pipeline. Its strength is speed for creators who want a finished vertical clip without touching a timeline. Its limitation is the same as most web tools in this class: less granular manual override than an editor working directly in an NLE would want.
Premiere’s Auto Reframe sits at the other end. It’s not a standalone product but a built-in effect, which means its biggest advantage is staying inside your existing edit. You keep your cuts, your color grade, your sequence structure, and layer reframing on top with adjustable motion presets. The tradeoff is that it’s manual by comparison: you’re still the one reviewing every sequence, since there’s no batch queue running unattended overnight.
API-driven platforms built on frameworks like Google’s open-source AutoFlip or Adobe’s Reframe API trade simplicity for scale. AutoFlip’s shot detection and camera-path optimization make it a strong foundation for developers building custom reframing pipelines, but it requires engineering resources most solo creators don’t have.
The honest takeaway: no single tool wins across all three axes of speed, control, and scale. Match the category to your actual job, then evaluate specific tools within that category.
Does Auto Reframing Actually Hold Up In Real Workflows?
Editors who’ve integrated Auto Reframe into Premiere workflows consistently report the same pattern: it saves the most time on simple, single-subject footage, talking heads, product shots, static interviews, and needs the most manual cleanup on anything with fast pans or multiple moving subjects.
That matches what the underlying research suggests. Industry commentary on reframing technology frames the shift as moving from static cropping toward dynamic content awareness, where the software acts more like a virtual camera operator than a simple crop tool. That framing holds up in practice, but “virtual camera operator” still means occasional bad calls on ambiguous scenes, which is exactly why manual override remains a non-optional feature rather than a nice extra.
Production teams processing high volumes report the opposite pain point: individual clip quality is rarely the bottleneck, throughput is. A team repurposing a weekly podcast into fifteen social clips cares less about perfect centering on any single clip and more about whether the pipeline runs unattended without someone babysitting exports. That’s the workflow impact APIs are built to solve, while one-click tools solve the opposite problem: maximum polish on a single asset, minimum setup time.

The consistent theme across both groups: tools that offer an easy way to fix a bad automated guess outperform tools that promise perfection and deliver none.
Where To Learn More About Auto Reframing Technology
Google’s AutoFlip framework is open-source and worth reading if you want to understand the shot detection and camera-path logic behind smart reframing. Adobe’s Reframe API guide includes working cURL examples for developers building automated pipelines. Cloudinary’s smart crop documentation covers transformation syntax for teams automating crop-and-resize at scale. For a broader look at repurposing workflows once your clips are reframed, Techvideoblog’s guide to AI video repurposing covers the next step.
The Real Lesson From Testing These Tools Side By Side
Most advice on auto reframing treats it as a single category, pick the “best” tool and move on. That framing misses the point entirely. A solo creator posting three shorts a week and an agency repurposing a daily podcast are not solving the same problem, even though both search for the same keyword.
What gets underestimated is how much manual override matters compared to raw AI accuracy. A tool with a slightly less sophisticated tracking algorithm but a fast, intuitive way to nudge a keyframe will outperform a flashier tool that locks you out of fixing its mistakes. That’s the gap between what auto reframing promises in marketing copy and what actually matters once you’re on a deadline with a bad automated crop staring back at you.

Prioritize testing overlay handling and manual correction before anything else. Speed and polish are easy to demo. What separates a tool you’ll still be using in six months from one you’ll abandon after the free trial is what happens when it gets a scene wrong, and how fast you can fix it.
Sources
- AutoFlip: An Open Source Framework for Intelligent Video Reframing
- Reframe API feature guide
- Smart Crop Video | Cloudinary
- Add Auto Reframe effect to sequences in Premiere
FAQ
What Does Auto Reframe Mean In CapCut?
Auto reframe in CapCut refers to its automatic subject-tracking crop, which analyzes a clip and repositions the frame to keep the detected subject centered when you change aspect ratio. It works similarly in concept to other one-click web tools, prioritizing speed over deep manual control.
How Do I Auto Reframe A Video In Premiere Pro?
Right-click your sequence, select the Auto Reframe option, choose your target aspect ratio, and Premiere duplicates the sequence with the Auto Reframe effect applied to every clip automatically. You can then adjust motion presets or override individual keyframes.
Is There A Free Tool That Can Automatically Edit Videos?
Several web-based tools offer free tiers for basic auto reframing, usually limited by clip length, monthly export count, or output resolution. Check retention policies and file size caps before relying on a free tier for regular work.
How Do I Change Auto Reframe Settings In CapCut?
Auto reframe settings in CapCut are typically adjusted by reselecting the target aspect ratio or reapplying the auto-crop feature after making timeline edits, since changes to your cuts can require rerunning the detection pass. If the subject tracking drifts, manual repositioning of the crop frame is usually available as a fallback.
Can Auto Reframing Handle Multiple Subjects In One Clip?
Multi-subject scenes are the hardest case for any auto reframing video tool, since the software has to choose a focal priority. Tools with semantic focal point controls, like Adobe’s focalPoints feature, handle this better than tools that only track raw motion or the loudest visual activity in frame.